Chickcozy Egg Incubator: Review (2026)
Chicken Fans is reader-supported. When you buy through our links, we may earn a commission. Learn more about our privacy policy and disclaimer.
As avid poultry enthusiasts with years of experience in hatching, we recently tested the Chickcozy Egg Incubator. We have hatched Pekin Bantam eggs using the Chickcozy Incubator.
Follow our journey!
In 2024, ChickCozy introduced its egg incubator, promising an unprecedented hatching experience. As an independent reviewer interested in poultry breeding, we put this device through its paces to see if it lives up to our high standards.
The Chickcozy incubator is a high-quality and competitively priced option for those looking for a plug-and-play incubator. It’s designed specifically to make it as easy as possible for you to hatch chicken eggs.
- Pre-assembled
- Plug & Play design
- Automatic egg turner
- Built-in candler
- Noise level up to 50db
- Display doesn’t light up
Finding the perfect incubator for your needs isn’t a simple task. But we have done some research for you and have incubated 12 Pekin Bantam eggs in the Chickcozy Incubator.
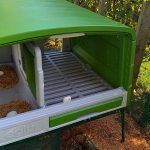
Design and Size
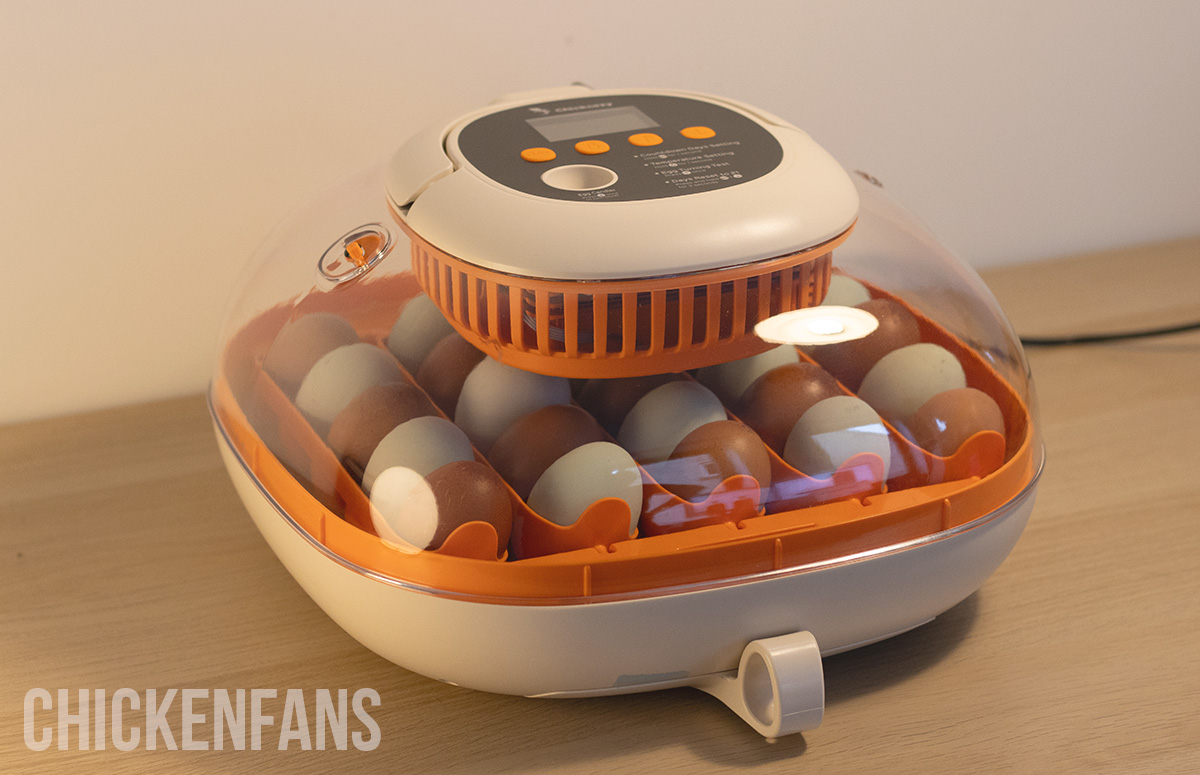
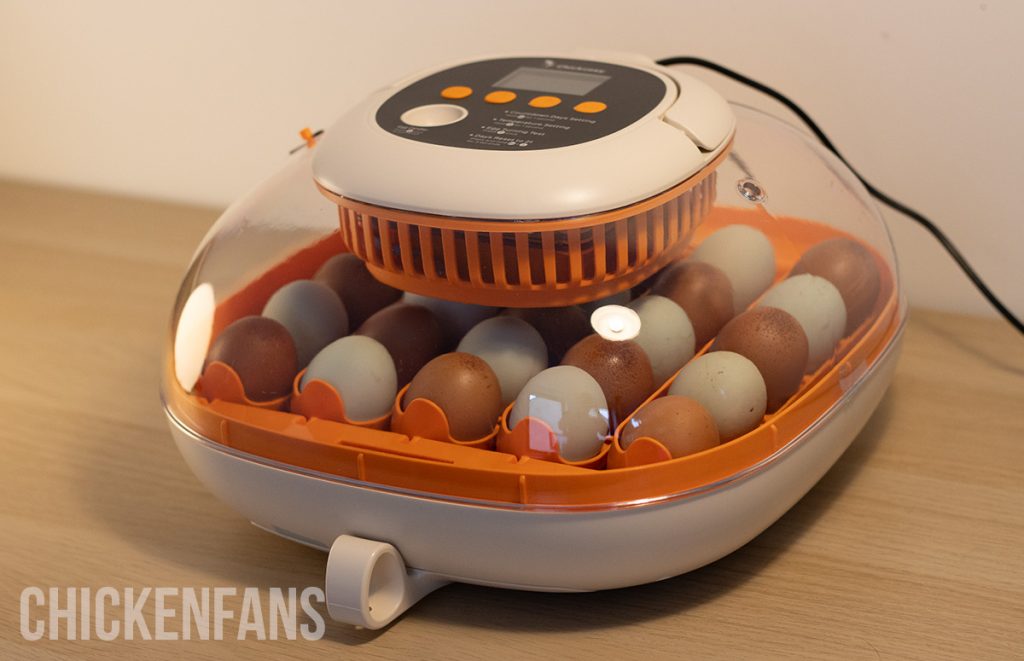
With its compact design and transparant observation dome, the ChickCozy makes it easy to keep an eye on your eggs without taking up much space.
Unlike bulkier models, it looks right at home on a countertop or desk.
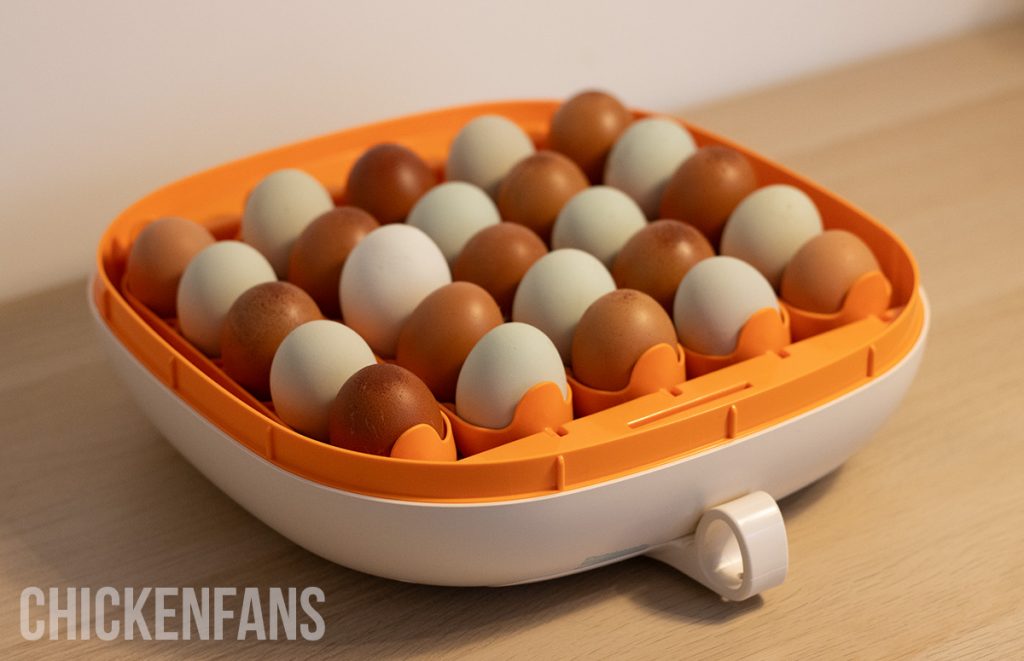
The incubator’s dimensions suggest it’s designed to be space-efficient, and the 25-egg capacity is quite generous for its size.
The circular layout visible through the dome suggests all eggs are equally accessible for heat and humidity, which is essential for hatching.
Features
This Chickcozy incubator is packed with known and less-known features. It’s designed specifically to make it as easy as possible for you to hatch chicken eggs.
Sure, it has the handy automatic egg turner that many other incubators have, but it doesn’t stop there. This incubator adds a fresh twist to the hatching process with additions like the built-in candler.
Let’s unpack the features that separate Chickcozy from its competitors.
- Water drawer design
- 25-egg capacity
- Automatic egg turner
- Thermometer holder
- Non-slip mat
- Slidable fan cover for easy cleaning
- Built-in candler
- Handle
- Hatching calendar included
Water Drawer Design
This feature of the Chickcozy incubator simplifies adding water to the machine to keep the humidity as it should be.
The humidity can be roughly adjusted by pulling out the water drawer and adding water to the area designated in the instruction manual.
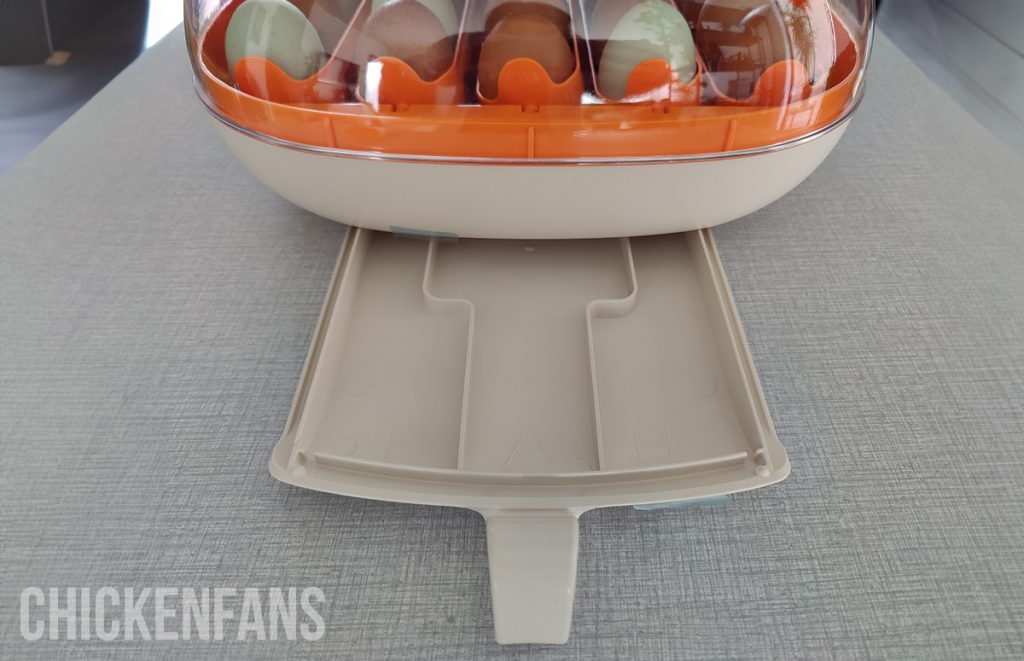
Next to that, the humidity can be further adjusted by opening or closing the small vent in the top part.
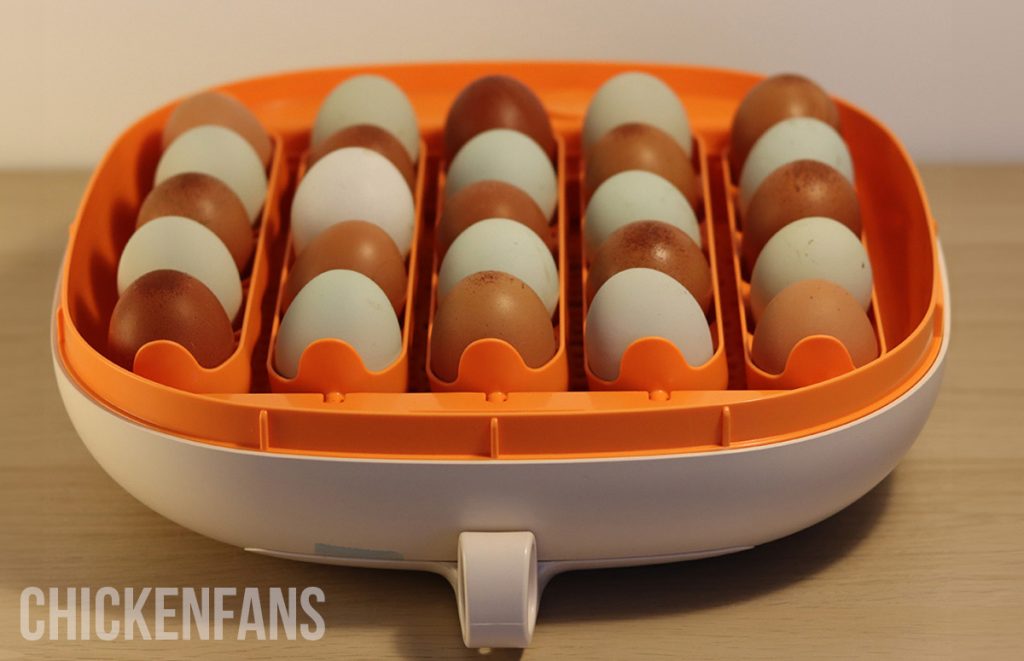
25-Egg Capacity
The capacity of 25 chicken eggs allows you to hatch a variety of eggs at once. The capacity is even quite generous for the size of the incubator.
The incubator can be used to hatch chicken eggs, quail eggs, and duck eggs. However, if you want to hatch goose eggs, you won’t be able to use the auto egg turner and the egg holders; you will need to turn the eggs manually, as they won’t fit in the holders.
Automatic Egg Turner
Say goodbye to manual egg turning. This incubator keeps the eggs moving, which is crucial for even development and prevents the yolk from sticking.
The automatic turning system will turn the eggs every 60 minutes from incubation day 1 to day 17, and it will stop turning automatically on day 18. From there, it is no longer necessary to turn the eggs.
Thermometer Holder
The incubator comes with a built-in thermometer, which shows the temperature on the display, but adding a thermometer holder inside the incubator is a thoughtful touch.
This holder allows you to use your personal devices for those with a go-to thermometer, or favor the classic mercury type for accuracy.
Also, since the incubator’s temperature readout is in Fahrenheit, the holder is convenient for those who prefer Celsius thermometers.
Non-Slip Mat
This feature is all about chick safety. The mat helps prevent leg problems, like spraddle legs, in newborn chicks, giving them a stable surface to stand on as they enter the world.

Spraddle legs, also called splay legs, are one of those conditions that can easily scare new chicken keepers. A slippery floor or bedding material in the brooder is the most common cause of spraddle legs in chicks. This non-slip mat will help prevent this in their early stage.
Slidable Fan Cover
This cover slides off so you can get to the fan and ensure it’s dust-free, which means cleaner air for your eggs and chicks and less work for you.
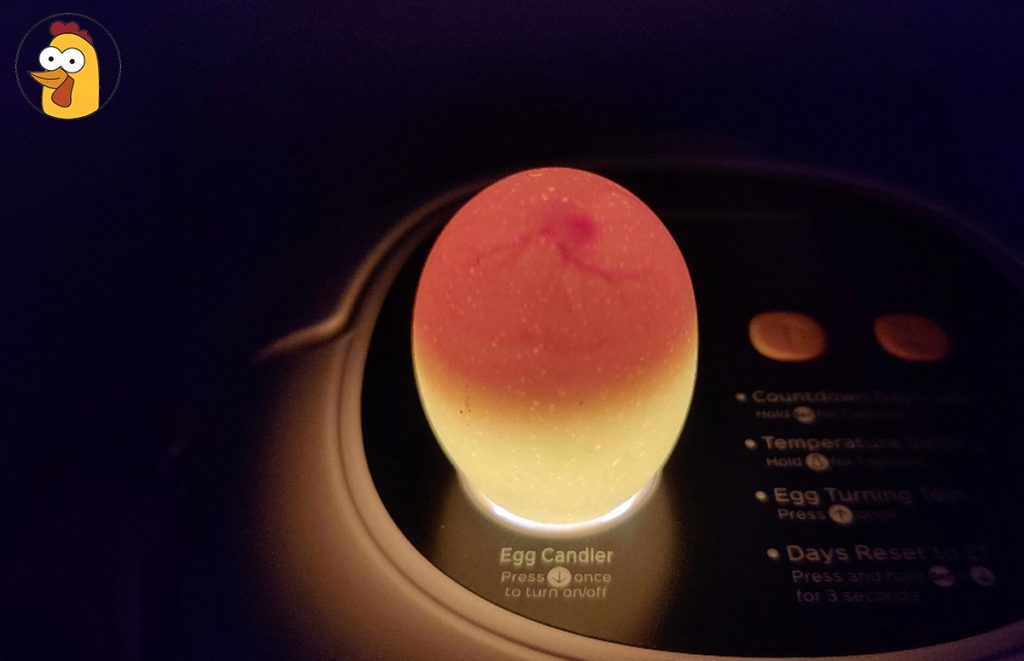
Built-In Candler
One of the best features of this incubator is its built-in candler. After a few days in the incubator, preferably around day 7 and day 14, you must candle the eggs. This way, you can remove all infertile eggs from the incubator.
This handy tool lets you place the egg on top of a bright light to shine through the shell, allowing you to see what’s happening inside the egg easily without disturbing the hatching process too much.
Handle
The handle makes it more convenient to remove the top from the bottom.
Hatching Calenders
Keep track of your hatching journey with five included calendars. It helps you note key milestones and expected hatch dates, keeping everything on track.
Things to Keep in Mind
Embarking on this hatching journey with the Chickcozy incubator can be an exciting experience, but it comes with a few crucial guidelines. Think of it as setting up a cozy, stable home for your future chicks.
- Keep It Indoors: Ensure your incubator stays inside, where you can control the environment better.
- Stable Conditions: Avoid places with big swings in temperature and humidity to keep things consistent.
- Safe Spot: Place the incubator out of reach from curious pets and small children.
- Off the Floor: The air near the floor is not always fresh due to higher carbon dioxide concentrations.
- Away from Windows: Sunlight and drafts can mess with the temp. Keep it in a spot that’s just right.
- Room Temp Matters: The room should stay, ideally, above 70°F to support the perfect hatching atmosphere.
Installation & Set-Up
Launching the ChickCozy incubator couldn’t be simpler, thanks to its straightforward plug-and-play setup. Just slot in the egg holders and connect the egg turner.
Understanding its functions is all that’s left, with no tricky steps involved. The incubator arrives with calibrated temperature and humidity settings, so you won’t need to fiddle with these settings yourself if you don’t want to.
You can manually adjust all settings if you prefer this.
We do recommend running the incubator for a couple of days before placing your fertilized eggs inside.
This trial run helps you familiarize yourself with its functions and ensures everything works perfectly, setting the stage for a successful hatching process.
In under 15 minutes, the incubator was out of its box and ready to go. We powered it up to explore its features, ensuring we were comfortable with the temperature settings and the countdown timer for hatching days.
Before Incubation
As mentioned earlier, it is necessary to test the incubator’s functions before introducing fertilized eggs. Once familiar with its operation, it’s time to prepare the incubator for the eggs. We’ll cover the essential steps to prepare for incubation next.
And how did we test as we are currently hatching 12 chicken eggs?
Incubation Temperature
The incubator comes pre-set at 99.5°F; there is no need for manual temperature adjustments. After plugging it in, the temperature will gradually increase to the optimal 99.5°F.
While manual adjustment is possible, as detailed in the manual, the default setting of 99.5°F usually suffices, requiring you to simply plug in the unit and let it warm up to the correct temperature.
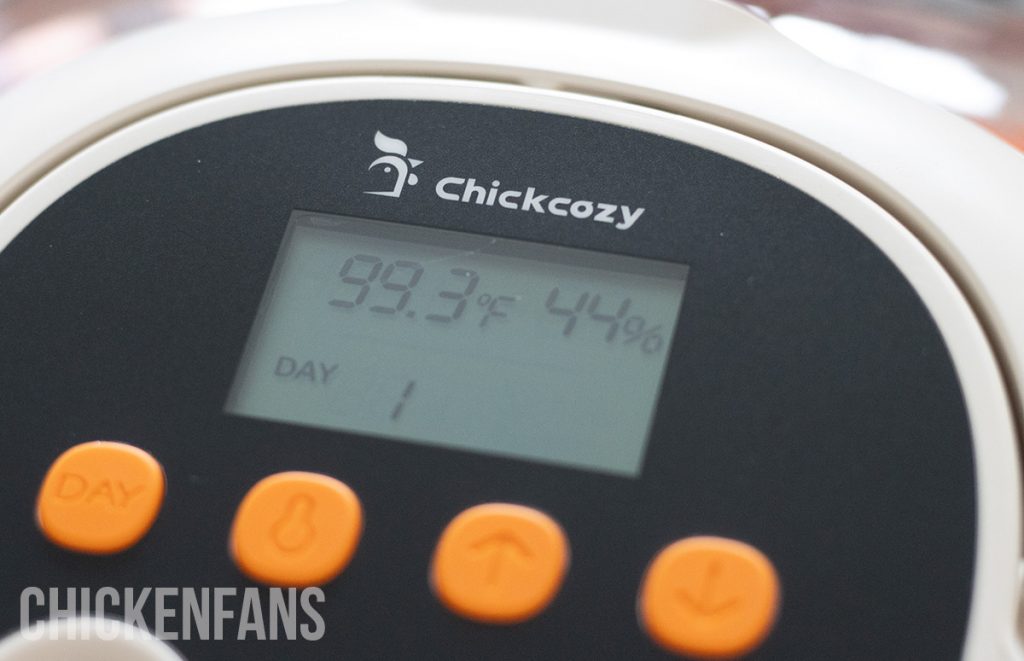
In our case, we manually increased the temperature to 100F°, the temperature we prefer for our bantam eggs.
The manual provides clear instructions on adjusting the temperature manually and is quite straightforward.
Within 30 minutes, the incubator was at the temperature we wanted.
Countdown Incubation Days
The ChickCozy incubator has a countdown display for incubation days. Once plugged in, the timer will immediately count down from 21 days, perfect for chicken eggs.
However, should you decide to hatch duck eggs (requiring 28 days) or quail eggs (which take 18 days), you’ll find that the manual provides easy instructions to change the incubation period to either increase or decrease the days, depending on the type of eggs you’re incubating.
No adjustment is necessary for chicken eggs, as the default setting is already at the ideal 21 days.
Control Humidity
For the first 17 days of incubation, the humidity should be between 45-55%.
According to the manual, this is achieved by filling the water drawer’s central area and adjusting the vent to a half-open position to avoid too much humidity.
However, in our experiment, we could not get the humidity level over 39% by filling the middle drawer with water and the vent half open, as described in the manual.
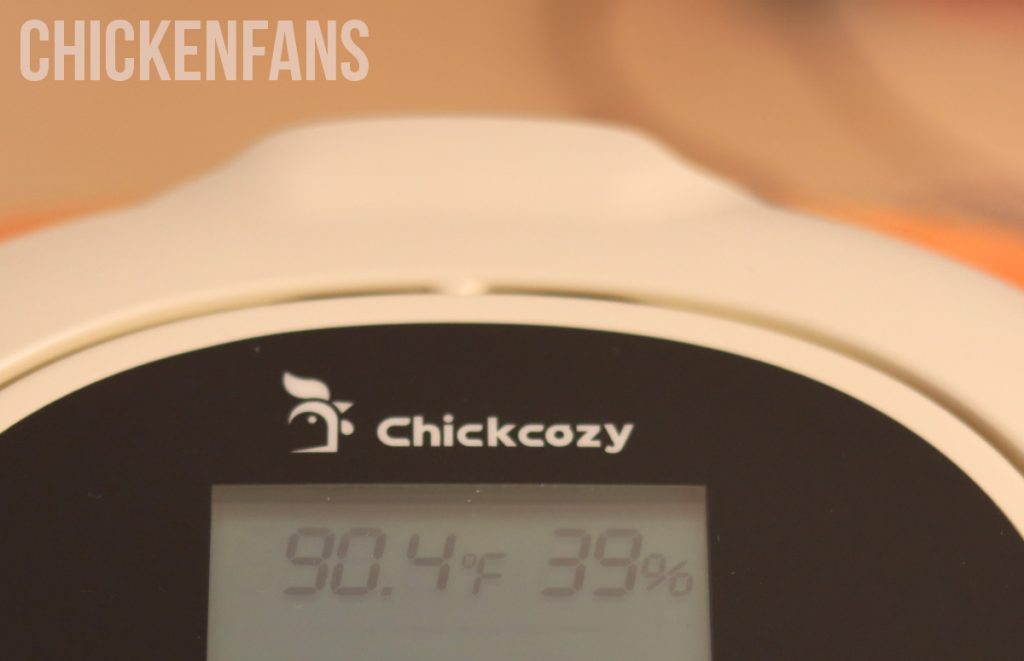
After several hours without a change in humidity, we decided to fill both the center and side areas of the water drawer. The humidity rose to 45-50%, and we only needed to adjust the vent a little bit to keep it stable.
Please remember to monitor the humidity after plugging in the incubator. If it doesn’t reach at least 45%, add more water to the tray and wait for the humidity to adjust before placing the eggs.
Every step for adjusting humidity levels is detailed comprehensively in the instruction manual provided with the Chickcozy incubator.
Incubation in Progress
How Did We Test the Chickcozy Incubator?
We have hatched 12 chicken eggs with the Chickcozy Incubator.
How exciting!
These eggs are bantam eggs of the Pekin Bantam.
Day 1 to Day 17
After the manual adjustments of both temperature and humidity, we are almost ready to place the eggs.
Before incubating, let the eggs sit at room temperature for 6 to 8 hours, pointed end down, possibly in an egg carton, and avoid refrigeration.
The next step is to place the eggs in the egg holders.
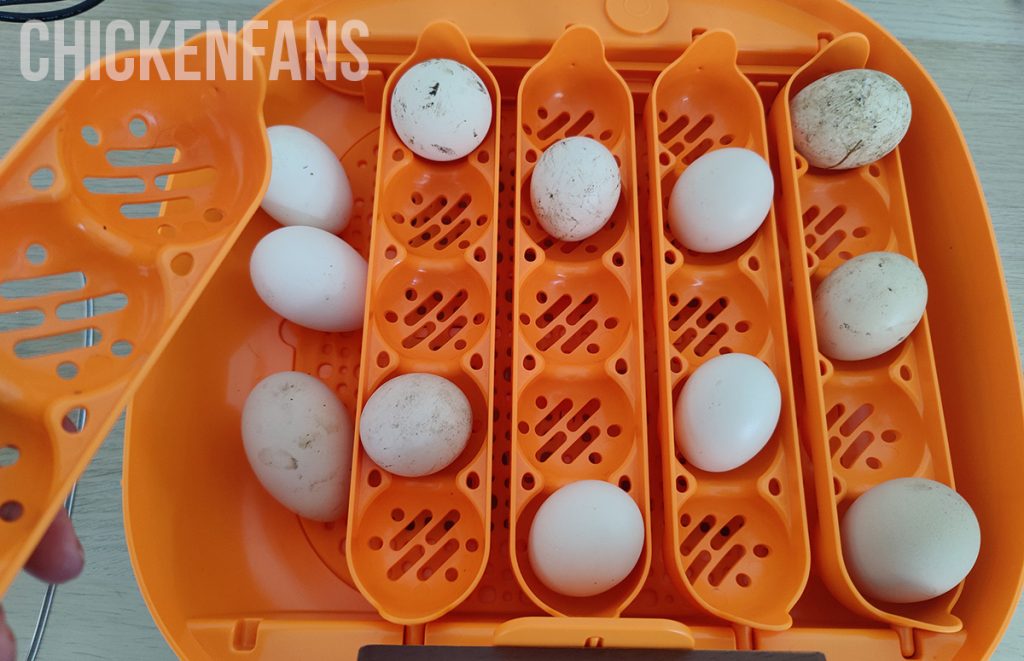
After placing the eggs, test the egg turner to make sure all eggs are placed steadily. The turner will automatically rotate the eggs every hour for the first 17 days.
We had no issues with the automatic egg-turning system. All eggs are turned without issues every hour.
Keep an Eye on Humidity Levels
As said before, we had to add water to all areas in the water drawer to reach the desired humidity. After three days, we noticed the humidity had dropped again to 40%.
We added additional water to the drawer, and the humidity level rose again. So keep in mind you will need to add more water to the drawer system every 3-4 days, not only in the center area, but also in the side areas.
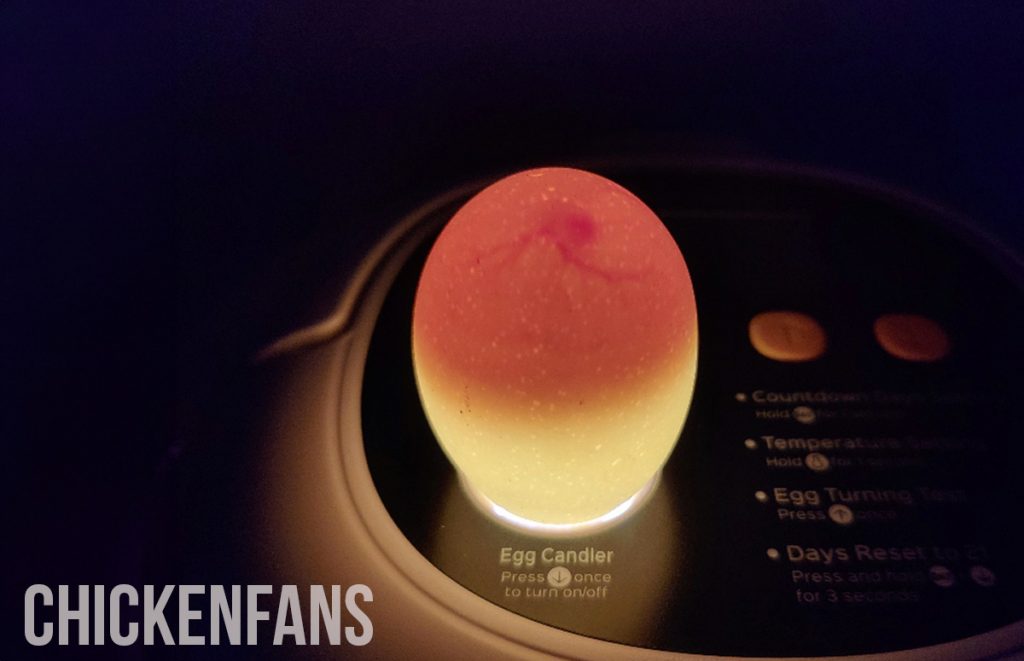
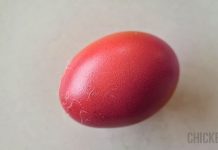
Candling the Eggs
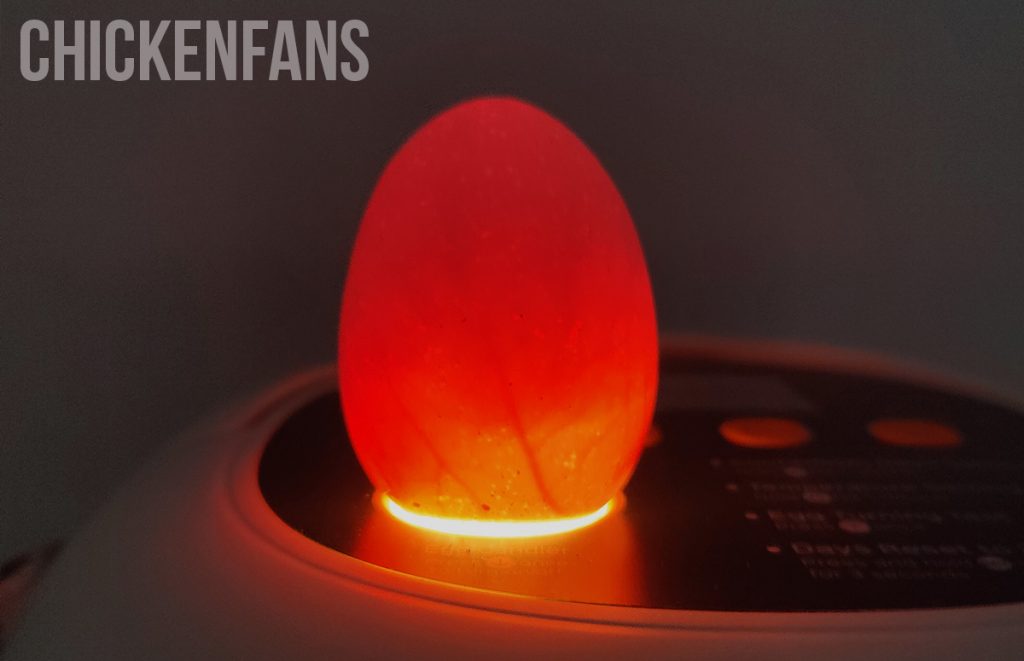
Mark the calendar for days 7 and 14 to candle the eggs. This is a great opportunity to use one of the Chickcozy incubator’s nicest features.
Use the built-in candler by placing the egg’s rounded end against the light and pressing the button, ideally in a dark room. Quickly candle all eggs to minimize time outside the incubator.
We candled the eggs on day 4 and day 9. We will probably candle one more time in a few days. This is what it looked like at day 9:
Dispose of any infertile eggs.
Day 18 to Hatching Day
When the countdown hits day 18 (day 3 on the display), the automatic egg turner will automatically stop turning the eggs.
It’s then time to remove the egg holders carefully. These holders are equipped with small feet, so they are designed to stand independently. Do not remove the egg turner adapter.
Transfer the eggs directly onto the incubator’s base. Fill the water drawer fully and open the vent to boost humidity for the final hatch stage.

Now, the anticipation builds as we await the arrival of the chicks.
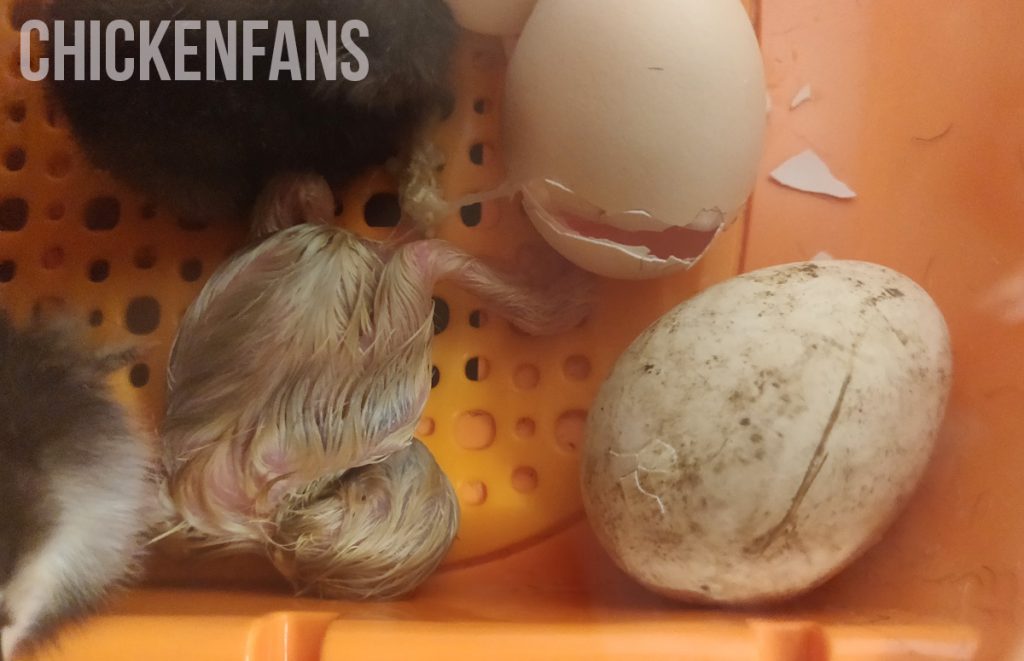
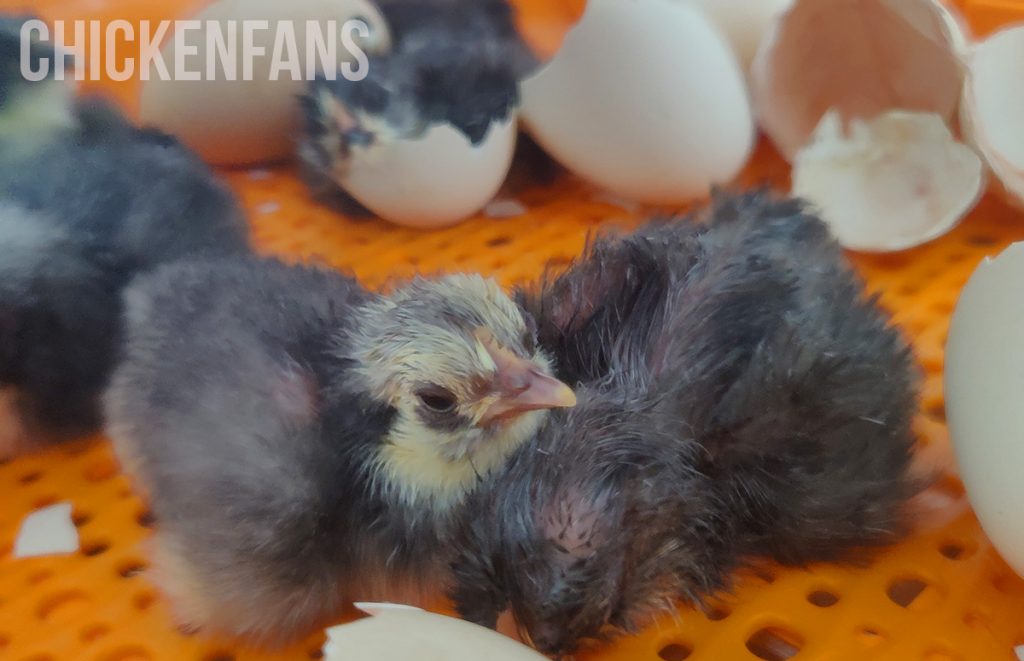
Hatching Day!
All chicks, except for one, arrived on days 20 and 21 of the incubation process.
The base of the ChickCozy incubator is more than spacious enough for around 11 lively chicks, and the anti-slip mat was also a nice touch that we find lacking in some other (more expensive) quality brands like Brinsea.
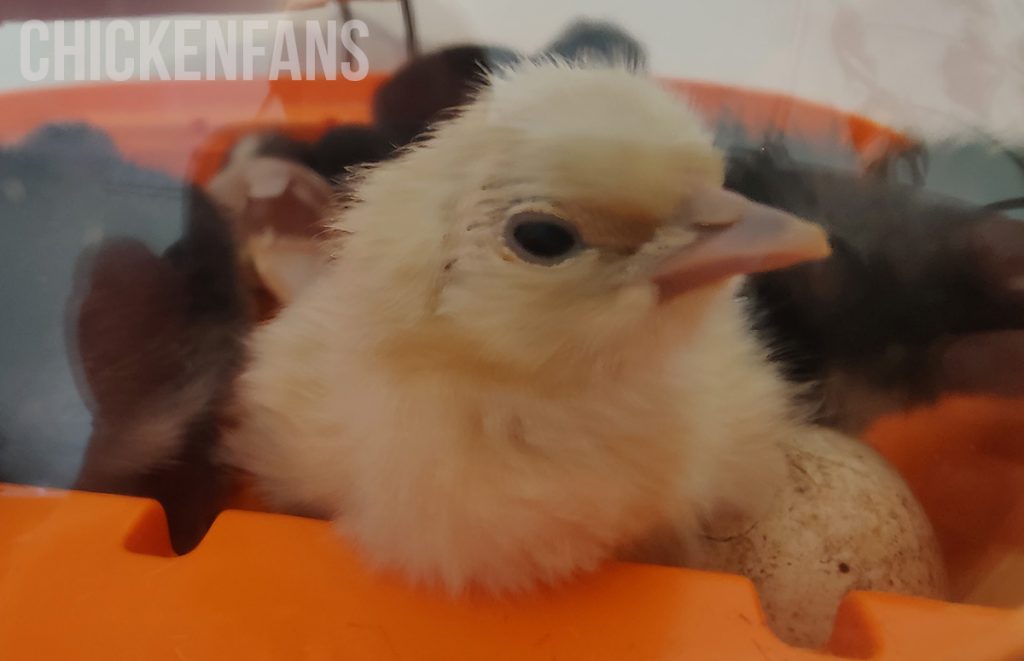
After hatching, it’s important to leave the chicks in the incubator for a minimum of 8 to 12 hours so they can fully dry.
The water reservoir is filled with down feathers and bits of eggshell afterwards, but it can be easily cleaned with a damp cloth.
Watch here as our chicks hatch!
Our Experience with the Chickcozy Incubator
The ChickCozy incubator is one of five incubators we recently tested. For us, although there are still some areas for improvement, the Chickcozy stands head and shoulders above the others.
Let’s explain the main differences between the Chickcozy and other incubators on the market:
- The design is compact, yet the incubator can accommodate 25 eggs.
- The temperature and humidity are clearly indicated on the display.
- The convenient built-in candling lamp makes candling eggs twice as easy.
- Extremely easy to use thanks to the plug-and-play system.
- Includes a built-in anti-slip mat to keep the chicks steady on their feet.
And much more…
You can tell that time has been invested in the design of the ChickCozy; this machine is made for and by chicken keepers.
It is also competitively priced compared to other brands on the market. You get a high-quality product for a good price.
However, there are some things to consider before completing your purchase.
Drawbacks of the Chickcozy Incubator
While the ChickCozy incubator offers many great features and convenience, it has its limitations, like any product.
In our experience with the ChickCozy incubator, we’ve encountered a few downsides worth noting.
Fahrenheit Only
First, it displays temperature only in Fahrenheit, which is inconvenient for those outside the US. There is no way to change it to Celsius, for example.
Additionally, the incubator comes with a US power cord for all customers. So, even for customers in Europe or the UK, the same US cord is included, but the company thoughtfully provides an adapter to ensure compatibility with local outlets.
For customers inside the US, this is not a problem.
Noise Level
Second, the noise level is consistently around 50 dB throughout the incubation, which might be noticeable in quiet environments.
Here, you can see our findings after recording the noise of the Chickcozy incubator while it is operating normally.
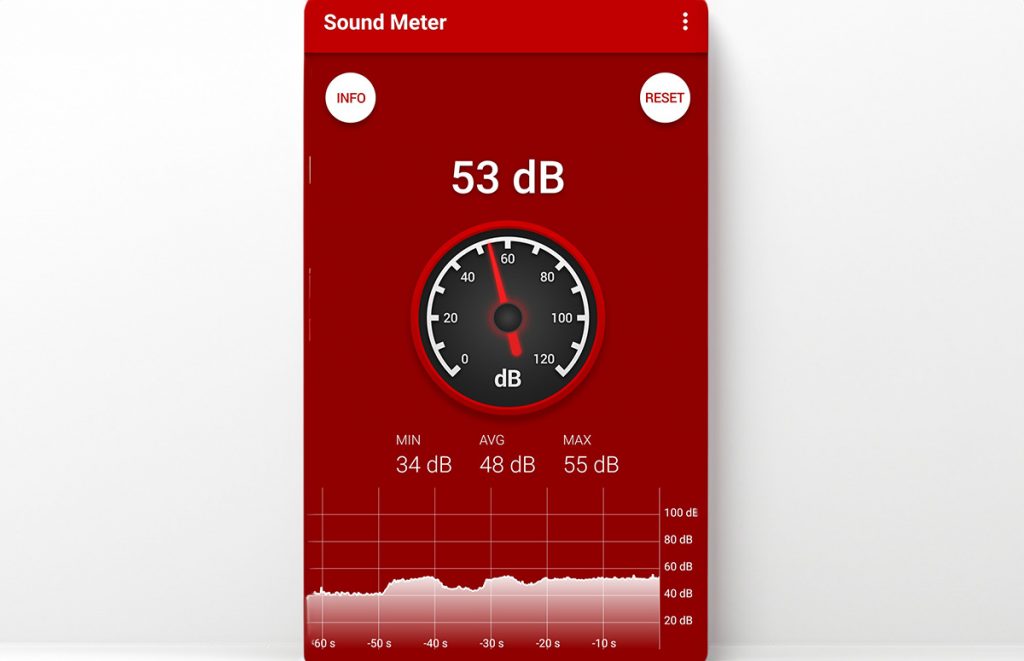
However, keep in mind that every incubator makes noise, and the ChickCozy is no exception. Therefore, placing an incubator in the bedroom, if you were planning to do so, is not a great idea.
Lack of Lock
Third, the lack of a lock between the top and bottom parts means moving the incubator by using the handle is not possible. This means you always need both hands to move the incubator, which can be unhandy, especially when tidying up.
No Display Light
Lastly, the display’s absence of backlighting makes reading challenging in low light conditions or at night, requiring additional light to check the settings or progress.
Based on our hands-on use, these points highlight areas where the incubator might fall short for some users.
What’s In the Box?
The ChickCozy incubator is delivered in carefully and attractively designed packaging, ensuring that it arrives in excellent condition.
The incubator itself arrives in securely encased foam. This extra cushioning ensures it stays safe and undamaged during shipping, which is a nice touch.
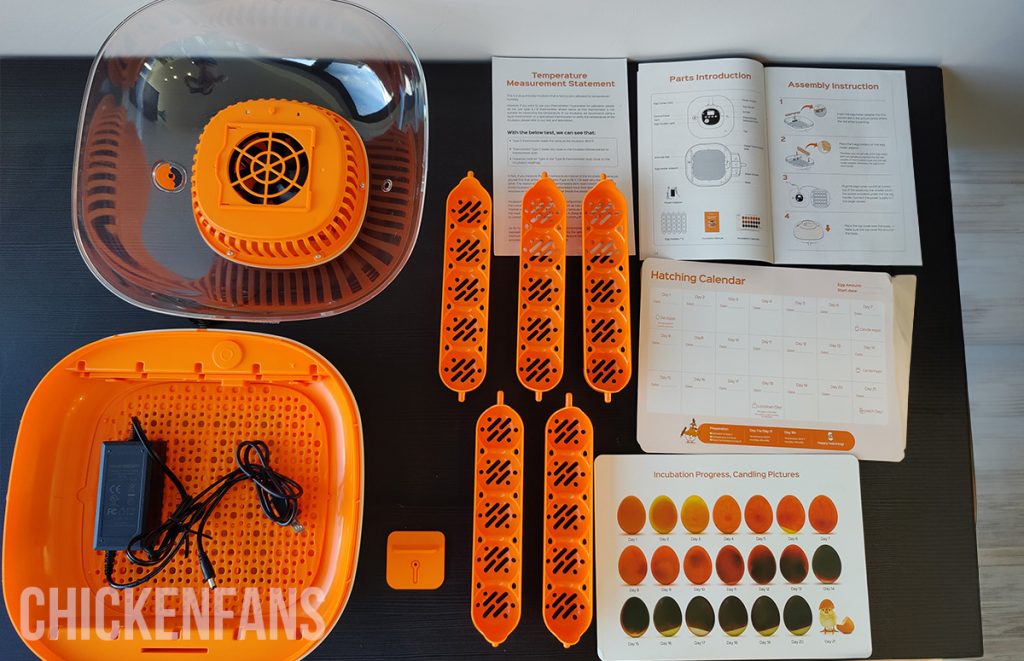
The package includes:
- the Chickcozy incubator
- 5 egg holders
- thermometer holder
- power cord
- 5 hatching calenders
- candling pictures
- instruction manual
Price and Availability
The ChickCozy incubator presents a sweet spot in pricing; positioned at about $150, depending on seasonal changes, it’s competitively priced.
While not the cheapest on the market, it offers significant value, especially compared to other high-quality incubators that often start at $200.
This pricing makes it an attractive option for those seeking a reliable incubator without breaking the bank.
It can be found on numerous webshops, including the official Chickcozy webshop. It comes with free shipping and is backed by a 2-year warranty, making it a valuable choice for those seeking quality and reliability in their hatching equipment.
Summary
The ChickCozy incubator, priced around $150, offers a good balance between cost and features. It’s designed for ease of use with a plug-and-play setup and accommodates up to 25 eggs with features like an automatic egg turner, a built-in candler, and precise temperature and humidity control.
While it comes with a US power cord, an adapter is provided for international users. Despite some drawbacks like noise level and a non-illuminated display, it represents value for money, especially compared to more expensive models.


