Omlet Automatic Coop Door: Review (2026)
Chicken Fans is reader-supported. When you buy through our links, we may earn a commission. Learn more about our privacy policy and disclaimer.
Automatic chicken coop doors are a great invention! Your chickens are safely tucked in each night, and you don’t have to worry about forgetting to open or close the coop. Several brands are selling automatic coop doors, and Omlet is one of the best-known.
We took their coop door to the test to write a thorough review.
Omlet is a well-known company that sells chicken products, including their automatic coop door. It differs in many ways from other doors on the market because it opens and closes like a sliding door, from left to right, rather than up/downwards. There’s only one version available of the Omlet Auto Door, but it comes in two color varieties.
- Sturdy and high-quality door
- Easy installment
- Sliding door
- Light sensor & timer
- Special design and look
- Batteries not included
- Rather expensive
Overview
The Omlet Auto Door was one of the top brands in our big automatic chicken coop door test, as it is a high-quality, unique sliding door.
Omlet only has one chicken coop door on the market, which is available in two colors: green and grey. It differs in many ways from other doors on the market because it opens and closes like a sliding door, from left to right or vice versa.
The door can be installed on the Omlet Eglu Cube chicken coop, a traditional mesh-style or wired run, or a wooden coop. Please note the door can NOT be installed on the Eglu Go and Eglu Go Up coops.
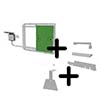
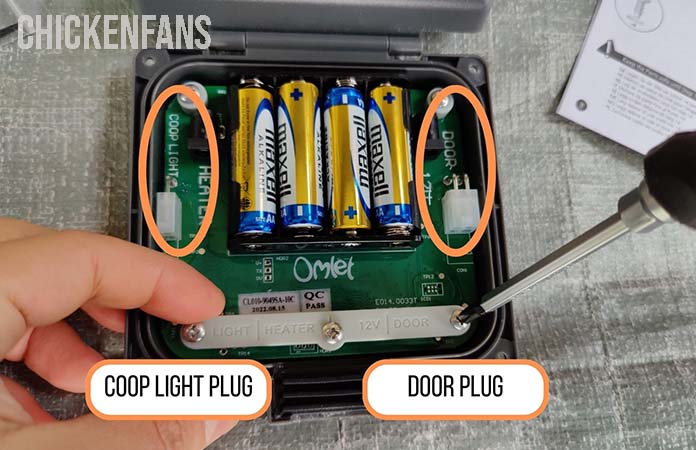
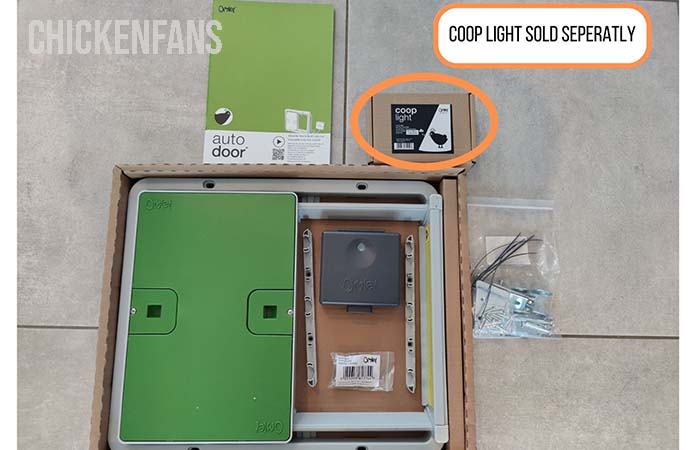
The package we received contained the auto door, a control panel, screws and fittings, the instruction manual, and a coop light (sold separately).
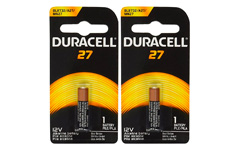
If you want to use batteries on the Omlet door, keep in mind they are not included (4xAA batteries), nor is the 12V power supply if you plan to use the door on main power instead of batteries.
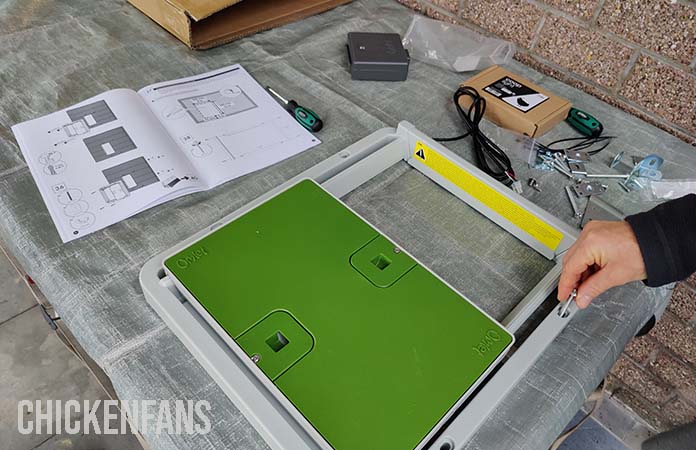
When opening the box, the door seems to be pre-assembled, with only some minor adjustments to be made. Therefore, we were a little surprised to see that the instruction manual consists of 101 pages (9 languages), and when opening the YouTube instruction video online, it is 42 minutes long. Not the most promising start.
However, after briefly watching the video, we realize it’s this long because all other installments are mentioned, whether you want to place the door on an Omlet coop, a wired fence, or a wooden coop.
Design
The Omlet door has a very recognizable and typical look; you either love it or you don’t. The door is made of ABS, short for Acrylonitrile Butadiene Styrene, an opaque thermoplastic known for its rigidity and strength.
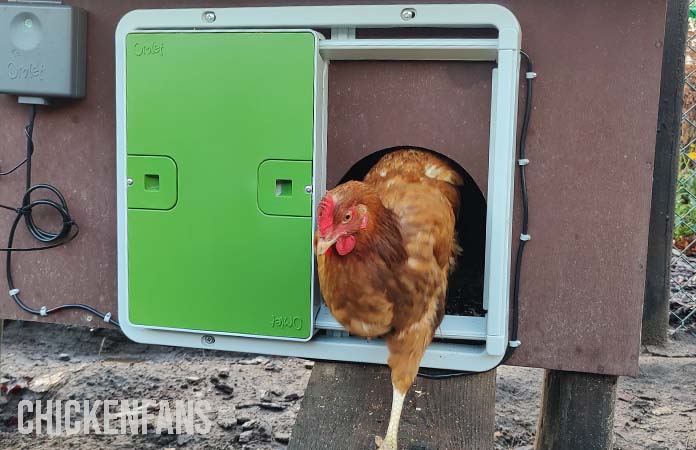
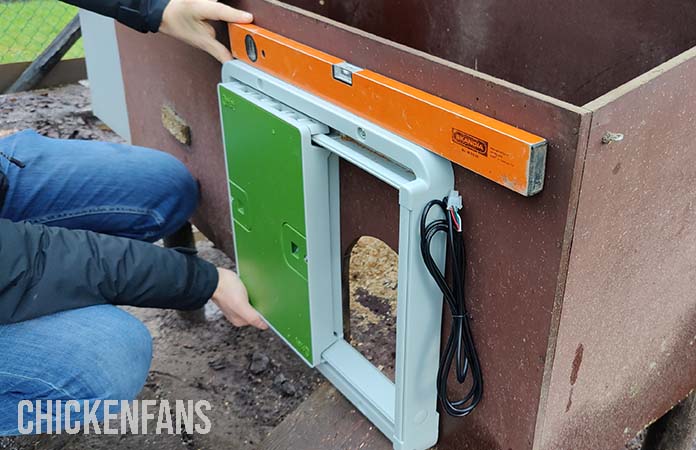
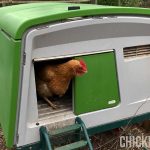
Two available colors for the Omlet coop door are green and grey. The door differs from many other automatic chicken coop doors, as it’s not a guillotine-style door but opens and closes by sliding from left to right and vice versa.
Look
Omlet sells a wide range of chicken products and chicken coops, all in their signature green look. Depending on your taste, you’ll eighter like it or not; there is no way in between, as the color and style are rather remarkable.
Omlet has two color options for the coop door. Their signature bright green or grey, for those who aren’t fond of the green color.
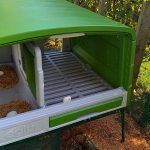
The door itself looks and feels sturdy. It’s designed to endure harsh weather and can stand temperatures up to -4°F (-20°C), which is more than most standard automatic chicken coop doors. The frame measures 19.25 x 2.25 x 16.5 inches (49cm x 42cm x 5.5cm) and weighs 8.38 pounds.
Outside vs. Inside Placement
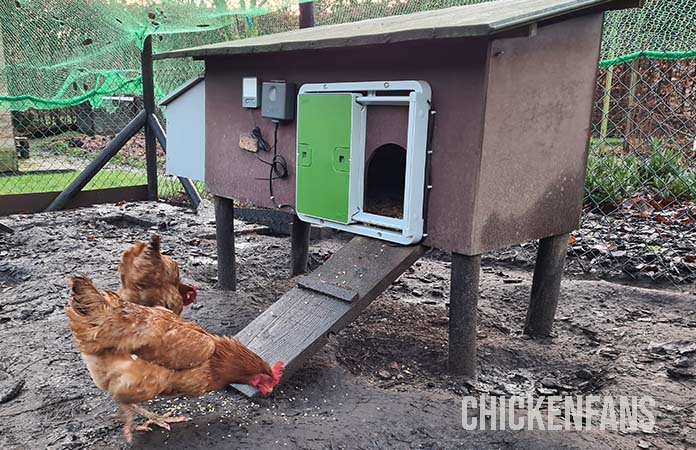
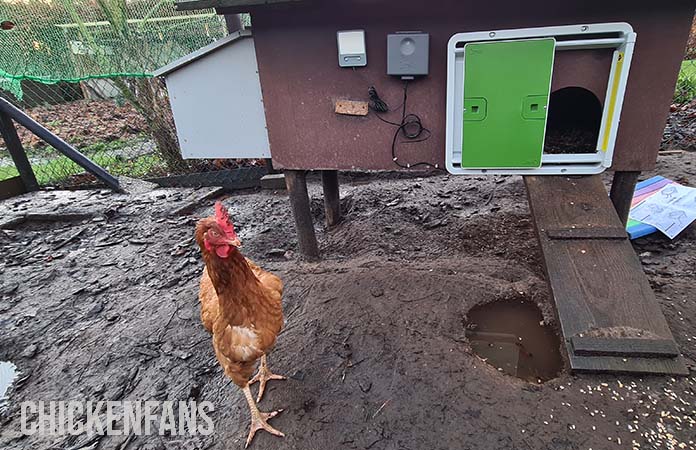
One of the best features of the Omlet door is that the control panel is separate from the actual door. It doesn’t matter how big or small your coop is; you’ll definitely find a place for both the door and the control panel.
Another great advantage is installing the door inside the coop while hanging the control panel on the outside so the light sensor can still be used. Some chicken keepers prefer to install the door on the inside so it can’t be seen from outside the coop when opened. This puts all ‘machinery’ out of sight, which can be preferable when having a chicken coop with a unique or authentic look.
Predator Proofness
The door is made from Acrylonitrile Butadiene Styrene (ABS), an opaque thermoplastic known for its rigidity and strength. It looks and feels sturdy, strong, and well-built. Once the door is mounted on the door frame and the coop, there is no wiggle room or openings for any predator.
The Omlet door isn’t a guillotine-style door but a sliding door closing from left to right or vice versa. Once closed, the door can not be pushed open in any way, not even by a smart predator trying to lift the door up. You can rest assured you’re chickens will be safe and sound at night.
Specific features
The main objective of an automatic chicken coop door is to protect your flock from predators entering the chicken coop at night, and you won’t have to get up early in the morning to open the door or remember to close it if you’re home late. So it has to be reliable and sturdy.
These basic features are the minimum requirements for a high-quality chicken coop door, and the Omlet door meets them without trouble.
But there are other features worth mentioning about the Omlet automated chicken coop door. Let’s have a look:
Built-in Safety Sensors
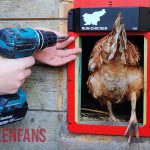
Most high-quality chicken coop doors, including the Omlet, have built-in sensors that detect an object (a chicken, for example) blocking the door. When the door closes and something is blocking the entrance, it will stop, reopen, and shut again automatically after a few seconds.
If the blockage is still there, if the door closes the second time, it will reopen again and close. This will happen four times, and if the blocking item is still there after four times, the door will stop in the fully open position.
Many cheap automatic coop doors lack this safety stop feature, although many claim to have it. Be careful to read reviews of cheaper automatic doors before purchase, as stories of hurt and trapped chickens are heartbreaking.
Next to the trustworthiness and ease of use, a built-in safety stop is an essential feature of any automatic chicken coop door.
In this video, we test the Omlet Auto Coop Door safety stop:
Alkaline Battery Supply
Many chicken owners don’t have access to electricity near their coop, so having an automated door that works on both main power and electricity is a big plus. But be aware that batteries are not included when purchasing the Omlet door; you need 4 AA batteries to power the Auto door.
According to the manufacturer, both lithium and alkaline batteries can be used to power the coop door. But if you’re purchasing a second-hand model that’s a bit older, it’s best only to use alkaline batteries, as lithium ones can affect the door’s function.
The 4 AA batteries should last 4 to 6 six months, depending on whether you’re installing the coop light. If you’re planning to install the coop light, be aware that the door can only run on batteries, not the main power. As the control panel has a small screen, it will use energy not only when opening and closing but also for using the screen.
The control panel shows the battery percentage so you can check the battery levels at all times. No warning light or signal tells you whether the batteries are low. You’ll need to check by yourself regularly.
Main Power Supply
Next to letting the Omlet door run on batteries, you can power it to a main power supply. If you prefer this method, remember you can not use the Omlet coop light as it will only work if the door is powered on batteries.
To power your door from a main outlet, attach it to a 12 V supply, which is not included in the Omlet door and must be purchased separately.
Please note: At this time, it’s not possible to purchase the 12V supply due to stock delays at Omlet, so the auto door can only be used on batteries.
Built-in Failsafe System
If there is ever a problem with your Omlet door, so it won’t open any more due to drained batteries or gets stuck along the way, it’s good to know the door can be opened manually. By unscrewing the two screws on the door’s front panel, the door can be opened by hand if any problem should occur.
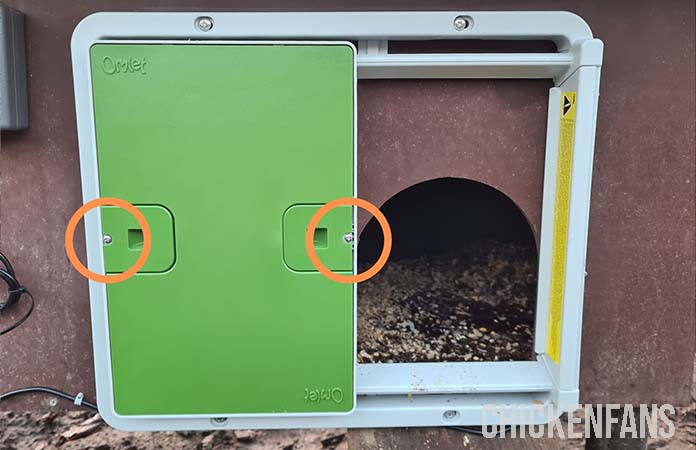
After releasing your birds and after solving the problem, put the door back into place and recalibrate it by pressing the ‘OK’ button for a few seconds.
Left or Right Door Opening
The Omlet door is unique in that the door does not open upwards but sideways. It’s a perfect fit for those who haven’t got high chicken coops or lack the much-needed space between the opening of the coop and the roof. Guillotine-style doors are the most common chicken coop doors but require extra space above the coop entrance, which many smaller coops don’t have.
Depending on what suits you best, you can also choose to have the door opening to the left or the right. By turning the Omlet door into the position that suits you best, the door will either have the opening on the right or the left.
Light Sensor vs. Timer
Like most high-quality automatic chicken coop doors, the Omlet door allows you to open the door using a light sensor or a timer. We’ll shortly discuss both:
Light Sensor
The light sensor is the easiest to use as it follows the seasons and always opens at dawn and closes at dusk. To prevent your chickens from being locked out of the coop or closed in the morning, you can adjust the settings of the light sensors.
The door opens and closes on a light level you can personally select, so you can wait until it’s completely dark for the door to close. That way, you’re sure all the chickens are inside. Another delay in opening or closing time is manually setting the door to operate an hour after dusk or dawn.
Not all chickens or flocks are the same. So we advise you to keep a close eye on your hens and the door the first nights and mornings so you can make any adjustments when needed.
Omlet claims their light sensor recognizes and ignores temporary lights from a security light or torch. Still, they don’t specify artificial street lights or bright party lights when your neighbors are having a party. However, when living in an area with very bright street lights, it’s better to be safe than sorry and use the timer instead.
Timer
If you don’t feel comfortable using the light sensor, you can use a timer instead to open and close the door at the same time each day. This way, you control when the door opens and closes each day without considering the changing seasons.
The Omlet door also has the option to manually open and close the door without having to rely on the timer or the light sensor. This takes away the whole point of an automatic coop door but comes in handy when you don’t want your hens to go outside without supervision for health reasons or other.
Size
The Omlet door and door frame are pretty big, measuring 19.25 x 2.25 x 16.5 inches (49cm x 42cm x 5.5cm) and weighing 8.38 pounds. But because the door does not open upwards but sideways, installment can be easier for those owning a smaller-sized coop. Also, you can choose whether the door opening goes on the left or the right.
No need to correctly measure everything before mounting the door. If the frame fits your chicken coop, so will the door, as it won’t overlap the frame. Just use a leveler to ensure the door is installed straight.
Ease of Installation
The Omlet auto door is pretty easy to install as it comes almost pre-assembled in the box. There are some little steps to take before mounting the door in its place and trying out the controller. If you don’t feel comfortable using the included manual (like us), Omlet has some excellent installment videos on YouTube that are easy to follow.
Don’t feel alarmed when you notice the installation video lasts almost 45 minutes, as it explains all possible installment methods for the Omlet coop door. You only need to follow the steps for your preferred installation method.
If you follow the instructions, you’ll enjoy your Omlet Auto Door in no time! Let’s see how that would look:
But let’s take it to step by step, and explain how to install the Omlet door and the control panel.
Before Mounting the Door
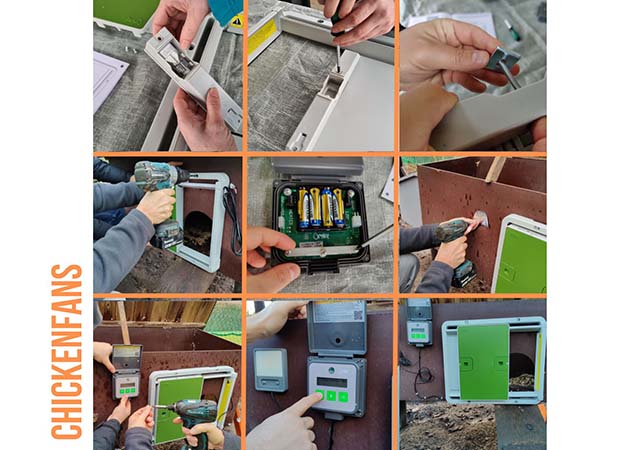
As said before, the Omlet auto door is pre-assembled, but you need to follow a few steps before installing the door to the coop and trying out the control panel. After unpacking the door, follow the steps in the manual (or the YouTube installment video); it only takes 10-15 minutes to complete the task.
At this time, the door is ready to be mounted to the coop, the only thing you will need to do later is install the control panel and calibrate the door, but we’ll get to that later.
Attaching the Omlet Door to a Wooden Coop
One significant advantage of the Omlet door is you don’t have to own an Omlet chicken coop to use their auto door. It can be easily installed onto any wooden chicken coop. Just fit the frame to where you want the door to go, drill some holes so the screws can be put into place, and you’re done.
If you want to follow the step-by-step installment for wooden coops, it can all be found in the instruction manual or the YouTube video.
Attaching the Omlet Door on an Omlet Coop
When having an Omlet Coop, called the Cube, it’s possible to attach the auto door effortlessly, but there is a big difference to keep in mind depending on which type of Cube you own.
Omlet Eglu Cube Mk1 House
The Mk1 is the first version of the Omlet Eglu House, and production stopped in 2017 because the newest version, Mk2, was released in 2016. The main difference between the first, older model and the second one is that you’ll need to purchase the attachment kit to install the auto door.
Be careful when owning an Mk1 to not only purchase the auto door but also:
- Auto door Mk1 Cube Mounting Kit
- Control Panel Mk1 Mounting Kit if you want to attach the control panel to the side of the coop
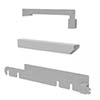
These extras make the purchase price higher, so be prepared to spend around $231 instead of $209, the coop light not included. If you recently bought an Omlet Cube (after 2017), you’ve probably purchased the newer model, and there is no need to get the Auto door mounting kit. But this is something to keep in mind if you’ve purchased a second-hand model.
Omlet Eglu Cube Mk2 House
All Omlet Eglu models currently sold are the Mk2 version; this latest version was released in 2016. When owning an Mk2 Cube, there’s no need to purchase the Auto Door Mounting Kit separately, as the attachment points are pre-located and already in place.
You will need the extra Control Panel Mounting kit if you want the control panel mounted to the main house. The mounting kit for the control panel can be purchased on the Omlet website.
Easily attach the control panel to the Eglu Mk2
Available at the Omlet Webshop
Attaching the Omlet Door on any Chicken Run
Whether your chicken run is a traditional mesh or wired run, or you have purchased the Omlet walk-in run or attached the Omlet Run to one of your Eglu Go coops, it’s possible to install the Omlet door directly onto the wire.
The only thing you need to keep in mind is to purchase the correct attachment kit to mount the door to the wire.
- Traditional Mesh Attachment Kit is for an easy installment of the Omlet Auto door on any mesh or wired chicken runs. Price: $16.
- Omlet Run Attachment Kit, for those purchasing the Eglu Go or Eglu Go Up together with the Omlet Run. Price: $8.
Installing the Control Panel
When the door is mounted to the coop or run, you only need to install the control panel and calibrate the door before use. We used batteries in the control panel instead of main power because the 12 V supply was unavailable at the time of purchase.
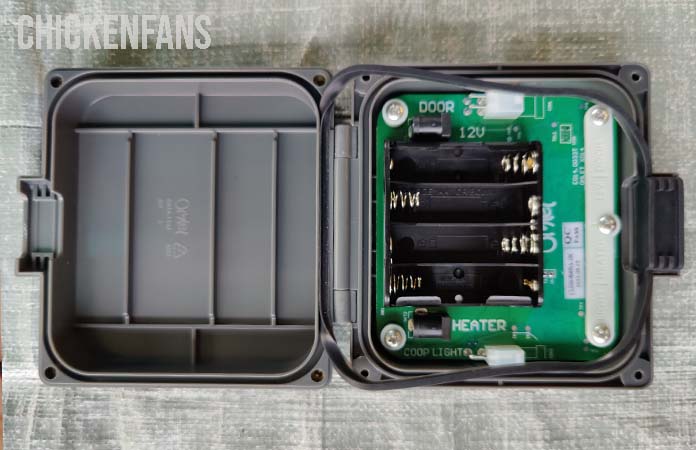
To put the batteries into place, you need to unscrew the control panel front and place 4 AA batteries. According to Omlet, you can use both lithium and Alkaline batteries on the current auto doors. But if you’re purchasing a second-hand model that’s a bit older, it’s best only to use alkaline batteries, as lithium ones can affect the door’s function.
Attaching the Control Panel to the Coop
Wooden Coop: When placing the control panel onto a wooden coop, screw the included mounting plate on the wood and slide the control panel back over to secure it.
Mesh or Omlet Run: Use the included cable ties to hang the mounting plate in place. Attach the control panel back to the mounting plate.
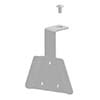
Eglu Cube Mk1 or Mk2: To mount the control panel on the Eglu Cubes, you’ll need an Eglu Cube Mounting Bracket sold separately ($8). Make sure you purchase the correct one, as the mounting brackets for the Mk1 and Mk2 are different.
Make sure to install the controller in a natural light environment of the run, as the controller’s orientation will affect the sensor’s light reading.
Do not cover the control panel.
Connecting the Coop Door to the Controller
Once the batteries are in place, and the control panel is attached to the coop or mesh wire, you’ll need to connect the auto door to the control panel. Once you’ve opened the control panel, you notice the plug where to connect the controller to the door.
If you have a coop light, this is also where you connect the light to the controller.
Calibrating the Auto Door
When everything is in its place, the door has to be calibrated before use. This way, the door detects its position when used for the first time. It’s explained in the instruction manual how to calibrate the door, but it’s very easy to do; press and hold the ‘OK’ button, and the door will calibrate itself by sliding one time in each direction.
This is what the door calibration looks like:
Choosing the Auto Door Mode
The Omlet auto door has three modes:
- Manually
- Timer
- Light Sensor
The default mode is the light sensor mode. Even if you don’t do anything to choose the open and close mode of the door, it will work on the light sensor, but you need to check the opening and closing settings.
By going through the control panel’s menu, you’ll be able to adjust any settings you want.
Timer vs. Light Sensor
The Omlet auto door has a light sensor and timer options, so you can choose which one to use. The door uses the light sensor by default, but you will need to check the light level and the delay in opening and closing.
By default, the opening light level is 26, and the closing light level is 6. The default delay is 20 minutes after the sensor has reached the preferred light level. If you want to adjust the default settings, follow the instruction manual to make the changes.
The light level settings can be somewhat confusing. You can choose any number between 0-100 to set the light level when the door has to close, with 0 being dark and 100 being light. Keep in mind that the default setting in an Omlet door is to close 20 minutes after reaching that light level. You can also adjust the delay if you find it unnecessary.
To use the timer mode, you’ll have to set the time before setting the opening and closing times. After selecting the time, you can set the opening and closing times separately. The door does not change the time automatically in case of summer or winter time. Keep that in mind when choosing the timer mode.
Maintenance and Durability in Extreme Weather
You can clean the Omlet door using a damp cloth. In case of heavy dirt or dirt stuck between the rails, removing the door from the frame is possible to give the door and rails a good scrub. Be careful not to get any water inside the gear module.
The Omlet coop door can endure extreme weather conditions. According to the manufacturer, the Omlet door has been tested in extreme conditions of -4°F.
What’s Inside the Box?
The Omlet Auto Door is nicely packed in a flat box. The company has a lot of packaging experience, which shows when opening the package. They only sell one version of the Omlet door, so you can’t go wrong with your purchase. We’ve ordered their first-ever Automatic Chicken Coop Door and were happy to find a sturdy, pre-assembled coop door, including the fixing gear.
The box contains:
- The Omlet Auto Door
- Control Panel
- Retaining Brackets
- Fixing gear like screws, gear stay,…
- Complete fixing pack, including a mounting plate for the control panel, a mounting bracket, screws, and cable ties.
- Instruction manual
The box does NOT contain the following:
- Batteries
- Coop light (sold separately)
- 12 V power supply cable
- Remote
Price and Availability
You can buy the Omlet Auto Door on the Omlet webshop or Amazon. Shipping costs aren’t free but are calculated on the place you live and range around $10. Always check extra costs before completing your purchase. UPS or FedEx usually does shipping.
The Omlet door costs around $180, around the same price range as many of its competitors.
Omlet accepts all sorts of payment methods like Credit/Debit cards (Visa, Mastercard, Maestro, American Express), Paypal, and Klarna. All the products, including the Omlet Auto Door, have a 2-year warranty. If you want to return an unused item purchased up to 180 days ago, Omlet will always accept the returned item but keep the original packaging to ease the return process. All other returns must go through their customer service first.
If you want to know more about automatic chicken coop doors: We’ve thoroughly tested many chicken coop doors and made a list of our Best Automatic chicken coop doors, including brands like Omlet, ChickenGuard, ChickenGuard All-in-One, Vevor and Vevor Premium, Run Chicken, Chickcozy and Happy Henhouse.
The Omlet coops were voted the ‘Best Overall’ on our ‘Best Plastic Chicken Coops‘ list, and are one of the best portable coops.


