How To Make a Chicken Saddle – Step by Step (Saddle Patterns Included)
A chicken saddle is a protective guard that covers a hen’s back during mating. Enthusiastic roosters often leave a hen with bald spots on her back if she’s not carrying a chicken saddle.
It’s pretty easy to sew your own chicken apron, even if you don’t have much sewing experience.
We’ll go over the entire process step by step.
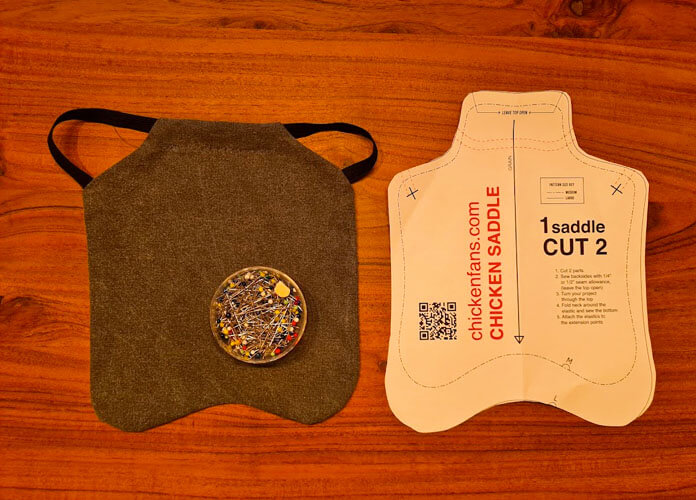
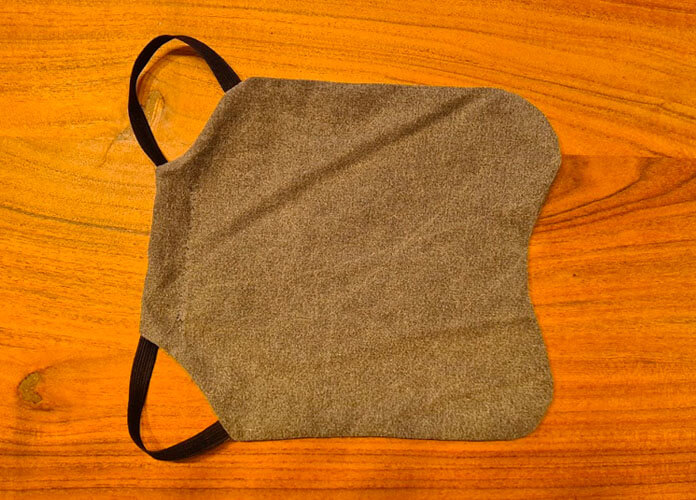
This is what the end result looks like:
You will need:
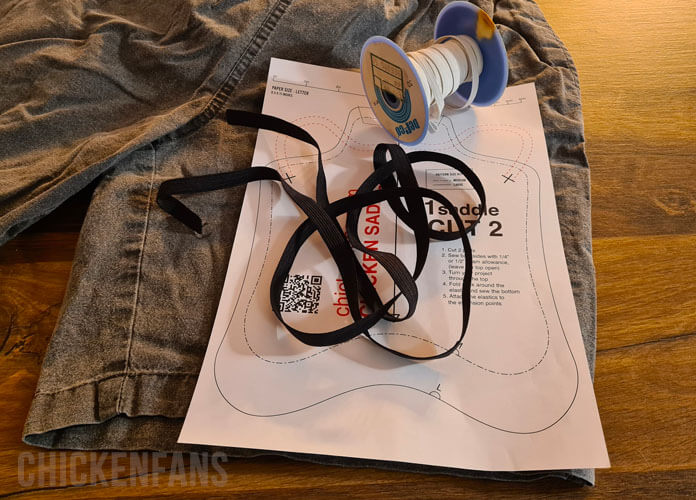
- our basic chicken saddle sewing pattern or one of our other chicken saddle patterns
- some fabric from old clothes, left-overs from a quilting-supply store, or fat quarters with a print you like
- essential quilting tools like scissors, rulers, needles, and pins
- elastic band
- a sewing machine
Step By Step Instructions
Time needed: 30 minutes
These are the steps to create a chicken saddle from one of our chicken saddle patterns.
- Print The Pattern & Prepare
Print one of our chicken saddle patterns that fit your chicken breed. The paper size is indicated on the pattern; most are Letter-size. If you can’t print Lette-sized paper, you can choose A4.
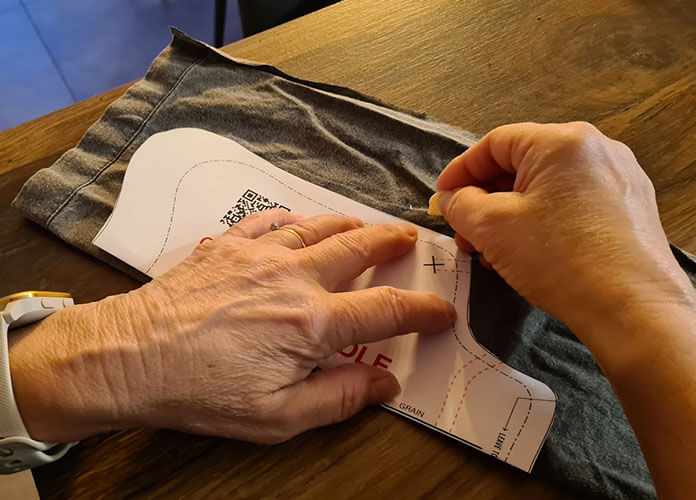
A word of warning about the print: don’t go wild with red colors and striking patterns. This might pique the interest of other chickens, and they can start pecking the saddle. It’s better to use a neutral color or a design that blends with the chicken’s feathering pattern - Prepare the Fabric
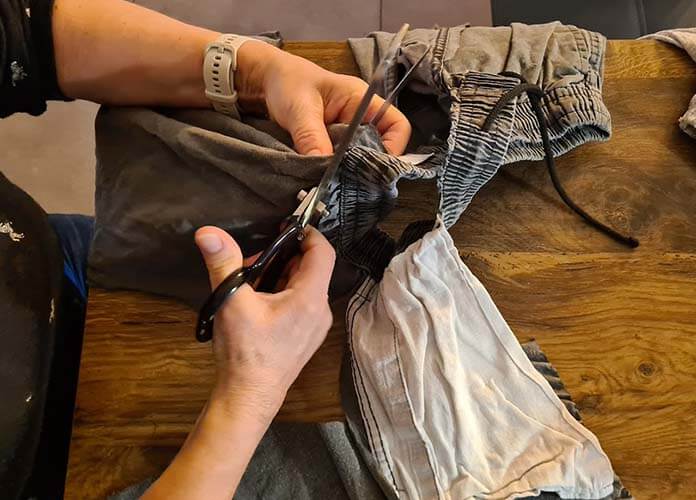
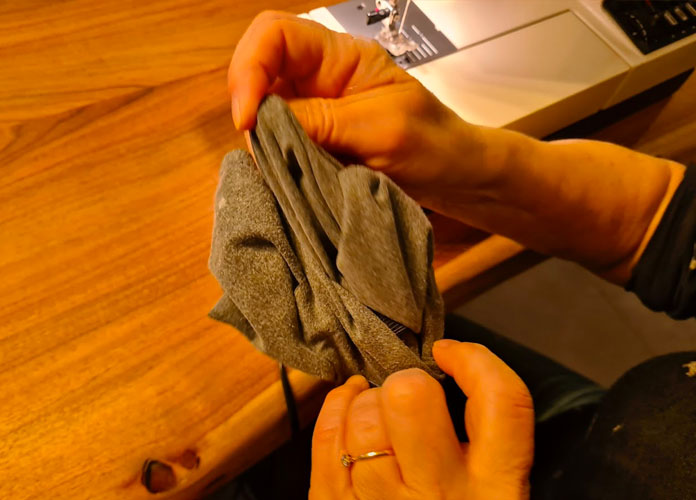
If you start from old clothes, cut some proper parts for the saddle. We’re using some old shorts here.
- Fold the Pattern
Fold the pattern in half to create two symmetrical parts. You could also just follow the pattern’s lines, but it’s easier to get it symmetrical if you fold the pattern.
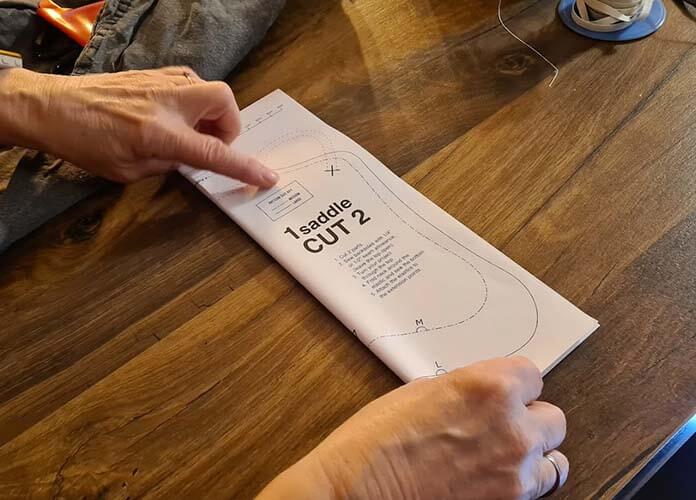
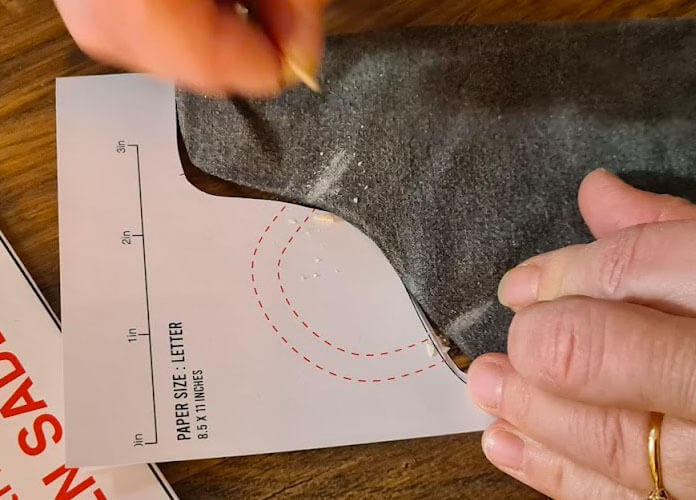
- Cut the Pattern
Multiple sewing sizes are printed on the chicken saddle template depending on the pattern. Our pattern above has a medium (M) and large (L). In our case, we are cutting out the large one. Cut on the line.

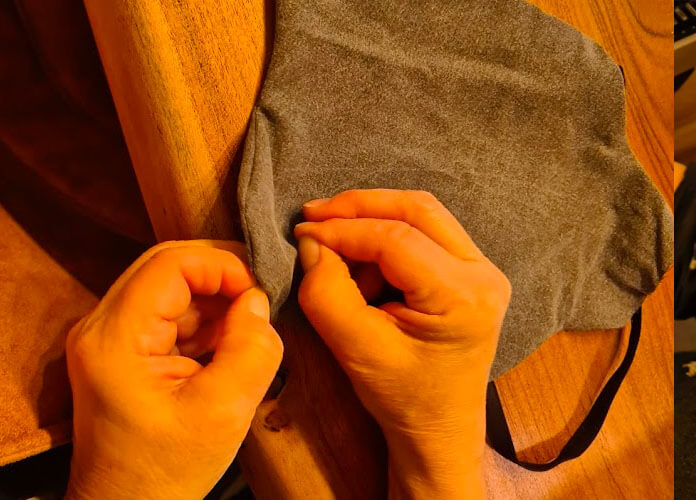
- Draw the Seam Allowance
Fold the fabric and place the pattern template on the fold. Draw the seam allowance on the fabric with a marker or soap.
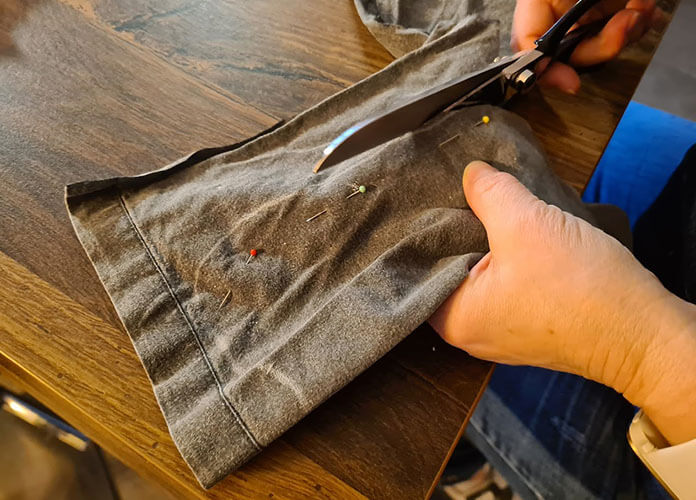
- Cut the First Piece of Fabric
Now cut out the fabric on the marker with the fabric still folded. This way, you have a completely symmetric hen saddle. Make sure to attach both sides first so they stay together while cutting.
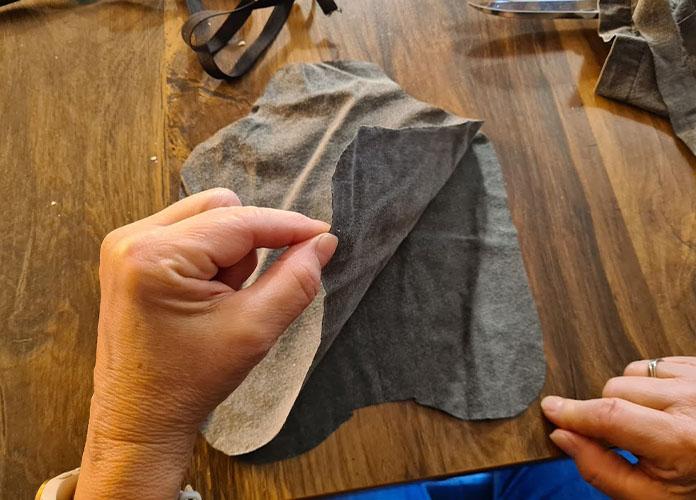
- Cut the Second Piece of Fabric
For the second piece of fabric, don’t repeat the entire process. Cut out the second part by using the first template as an example. That way, you are sure they are exactly the same size.

- Optional: Add Extra Filling
The result of the previous step is two identical pieces of the saddle. Feel free to cut out some extra filling to make the harness more sturdy. If your fabric is light, it can sometimes curl up on the chicken’s back.
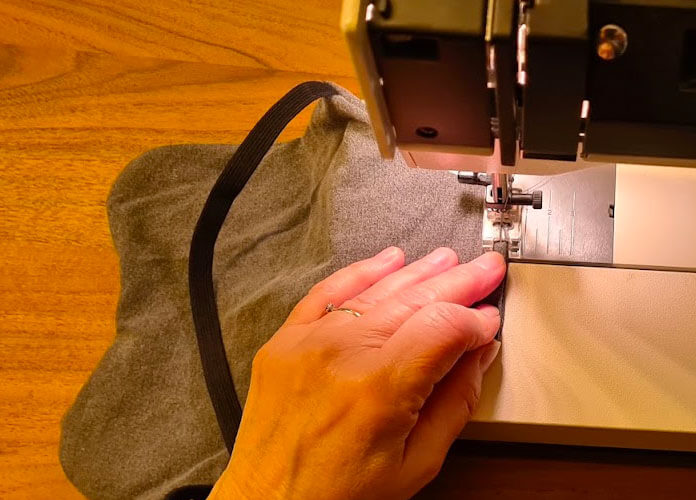
Now let’s go to the sewing machine. - Mark The Elastics
We sew the elastics so they will end up inside the saddle. It looks prettier and prevents any damage from having the elastic ends on the outside, where the rooster’s claws are. First, mark the elastics using the chicken saddle pattern as a template.
- Sew The Elastic Attachment Points
Cut an elastic at length and sew it on the backside of the fabric. Only sew the outer attachment points and leave the middle open. In the picture above, we will stitch only the lower marker. The elastic needs to move freely in the part of the neck. Make sure to sew on the backside.
This might look a bit counterintuitive, but everything checks out when we will turn the project later on. It should look like this: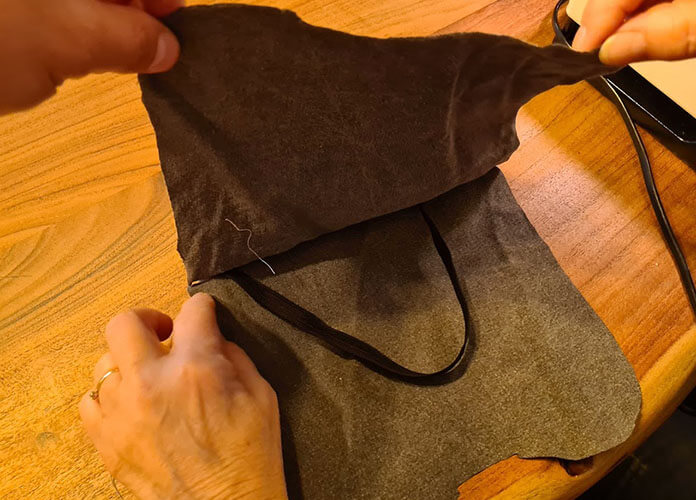
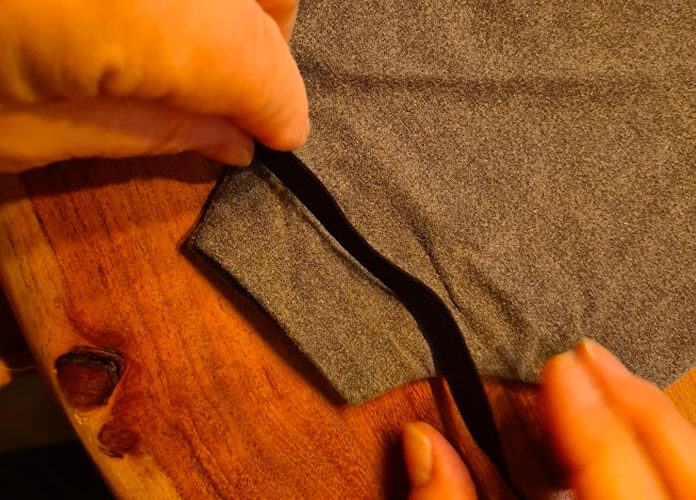
- Sew the Outline
Sew the outline using the backsides of the fabric so the saddle is inside out. Use your sewing machine as a guide for the seam allowance you marked earlier. The pattern calls for 1/2″ or 3/4″, but this ain’t a personalized prom dress, so feel free to use whatever suits you the best.
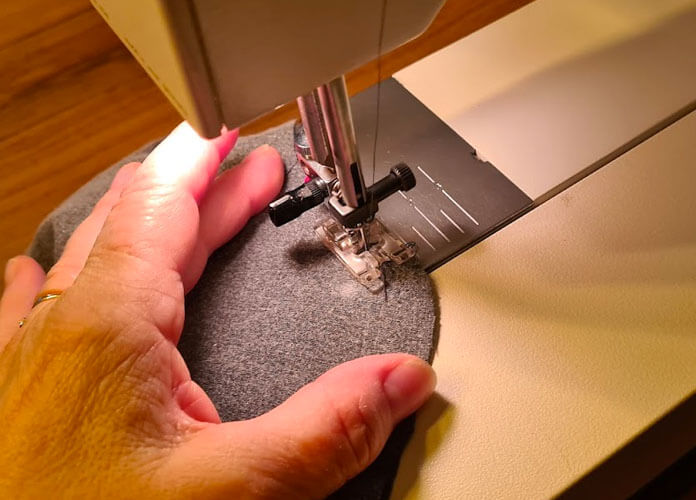
- Strengthen The Neck Stops
Leave the neck open as indicated on the pattern. Go back and forth on the ends to strengthen the stops of the sewing line.
- Turn Your Project
Turn around your whole project through the gap on the top. That way, the good sides of the fabric end up on the outside together with the elastic.
- Straighten the Fabric
Straighten out the seams of the fabric by pulling them out.
- Finish the Neck
To finish the neck, seal the fabric by sewing both parts together.
- Place the Elastic on the Neck
Fold the fabric around the elastic, so it can freely move around. This will help when you install the saddle when you need to put the chicken’s wings through.
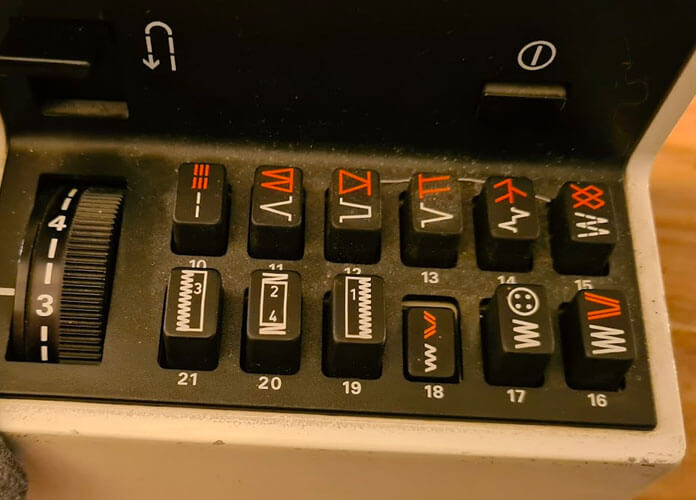
- Select a catch-stitch to sew the parts together
We are using a catch-stitch to sew these parts together.
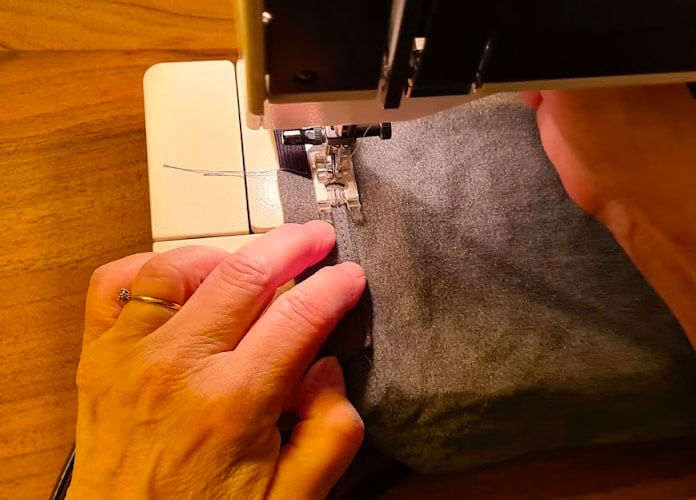
- Sew the Neck
To finish the neck, seal the fabric by sewing both parts together. Sew right next to the elastic so the elastic can still move.
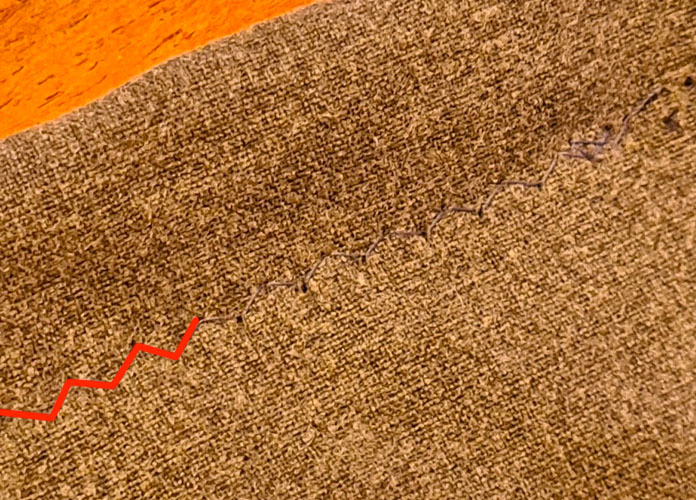
- Inspect the Cross-Stitch
The result looks like a cross-stitch on the back of the chicken.
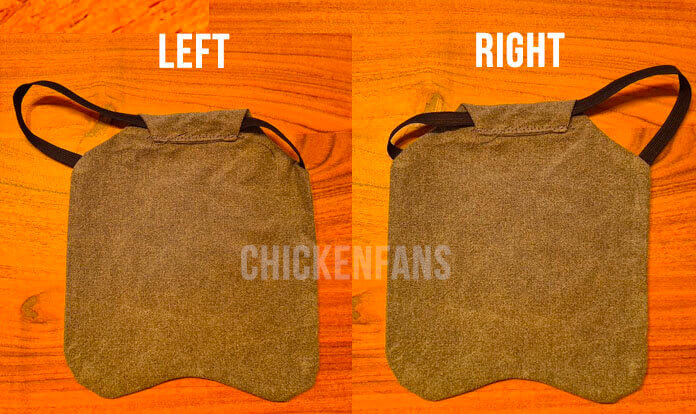
- Verify the Mobility of the Elastic
The result is a chicken saddle where you can freely move the elastic from left to right.
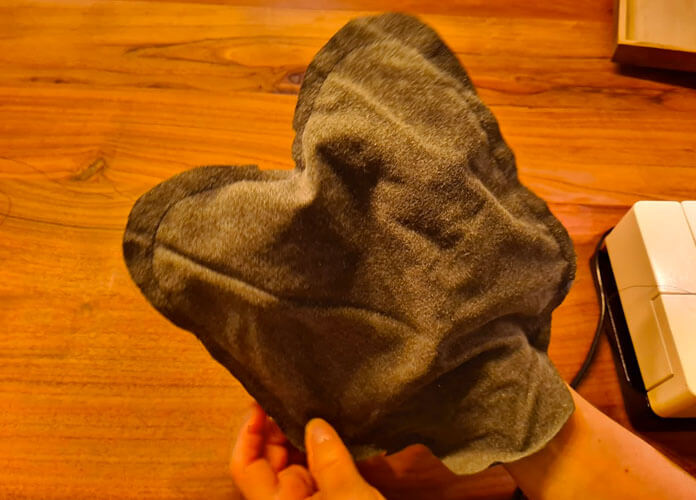
- Final Result
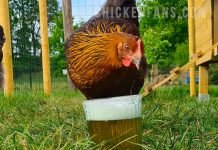
The final result should look something like this.
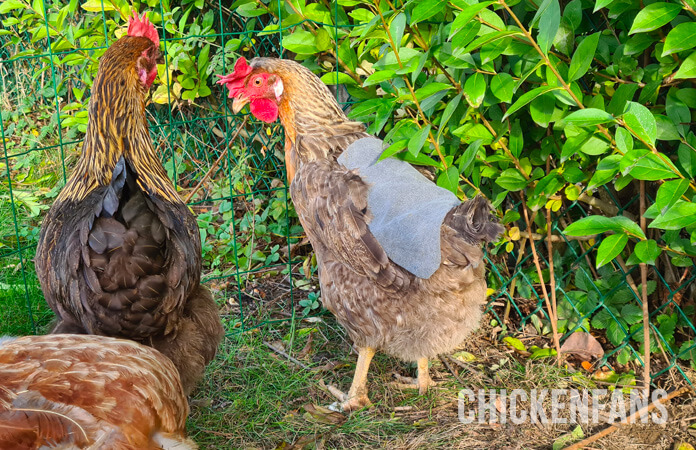
Here is a fairly big Green Egger wearing the Large version of the saddle:
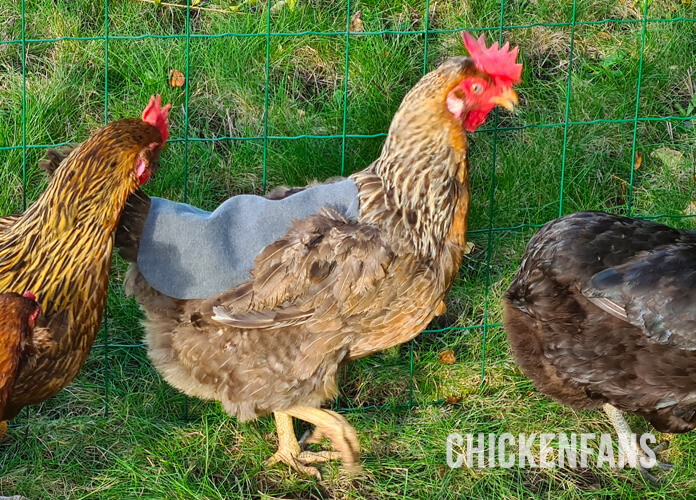
You can see how she adjusts the saddle after it’s just put on:
Now it’s your turn!
Download one of our chicken saddle patterns, and you’re ready to go!
This is the pattern we used: Chicken Saddle Pattern for Regular-Sized Chickens (Printable PDF)
You can also use one of our other saddle patterns or use the pattern with extra wing protection and tail guard.
Good luck!
We’d love to hear from you. Tag us on Instagram with your finished project!


