ChickenGuard All-In-One Chicken Coop Door: Review (2026)
Chicken Fans is reader-supported. When you buy through our links, we may earn a commission. Learn more about our privacy policy and disclaimer.
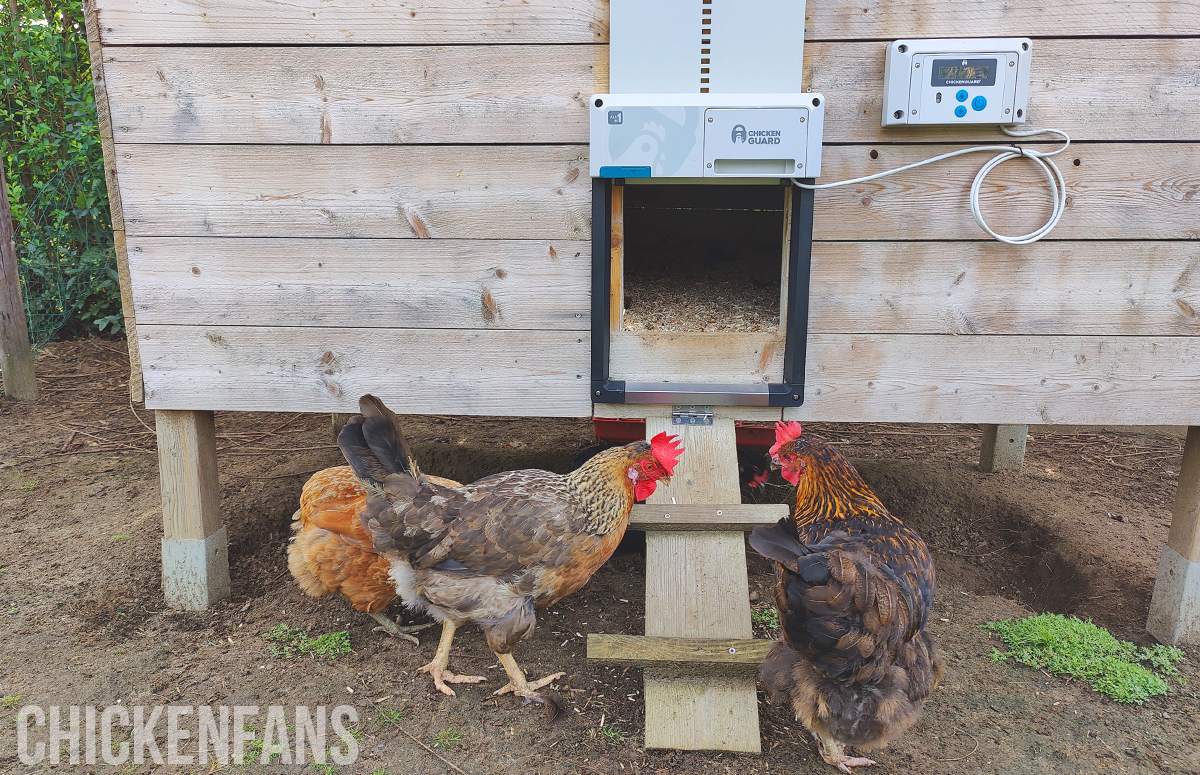
Regarding automatic chicken coop doors, trust in the brand matters. ChickenGuard is a well-known manufacturer of automatic door openers since 2013. Recently, the company launched a new coop door, completely pre-assembled and easy to install: the ChickenGuard All-in-One.
We tested their new all-in-one model to see if it met our high expectations.
ChickenGuard demonstrates why they have years of experience producing chicken coop doors. In 2023, the company launched a new coop door, completely pre-assembled and easy to install: the ChickenGuard All-in-One. Unlike their previous coop door openers, which utilized a guillotine-style aluminum gate guided by two plastic runners, the All-in-One departs from a pre-assembled design.
- Easy installation
- Rigid aluminum door
- Clean design
- Light Sensor & Timer
- Difficult to read the display in sunlight
- Large and heavy door
- App only works on DC power
Overview
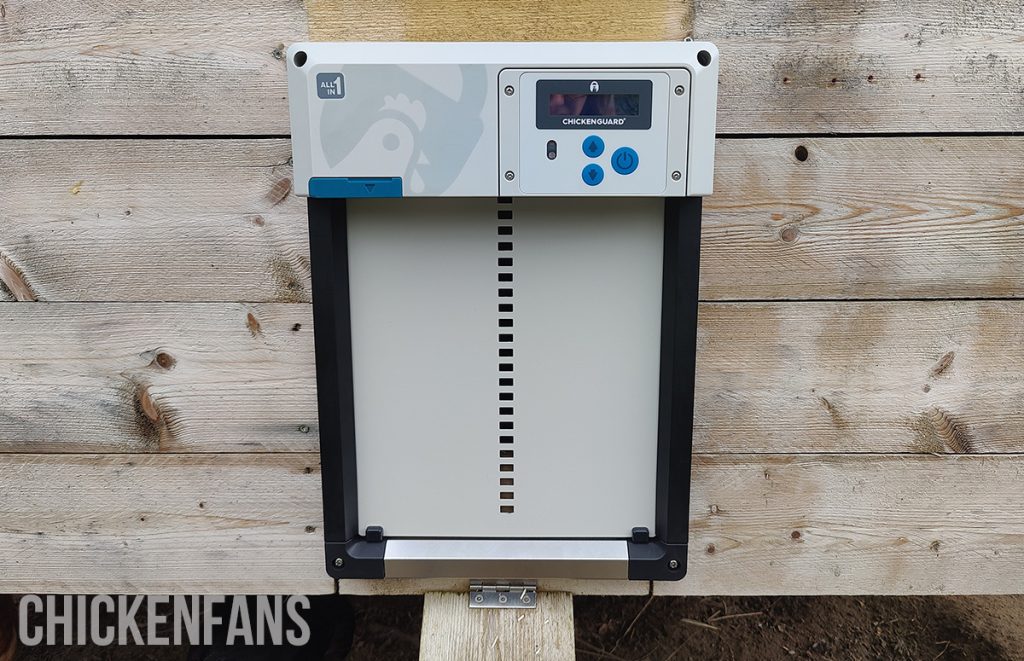
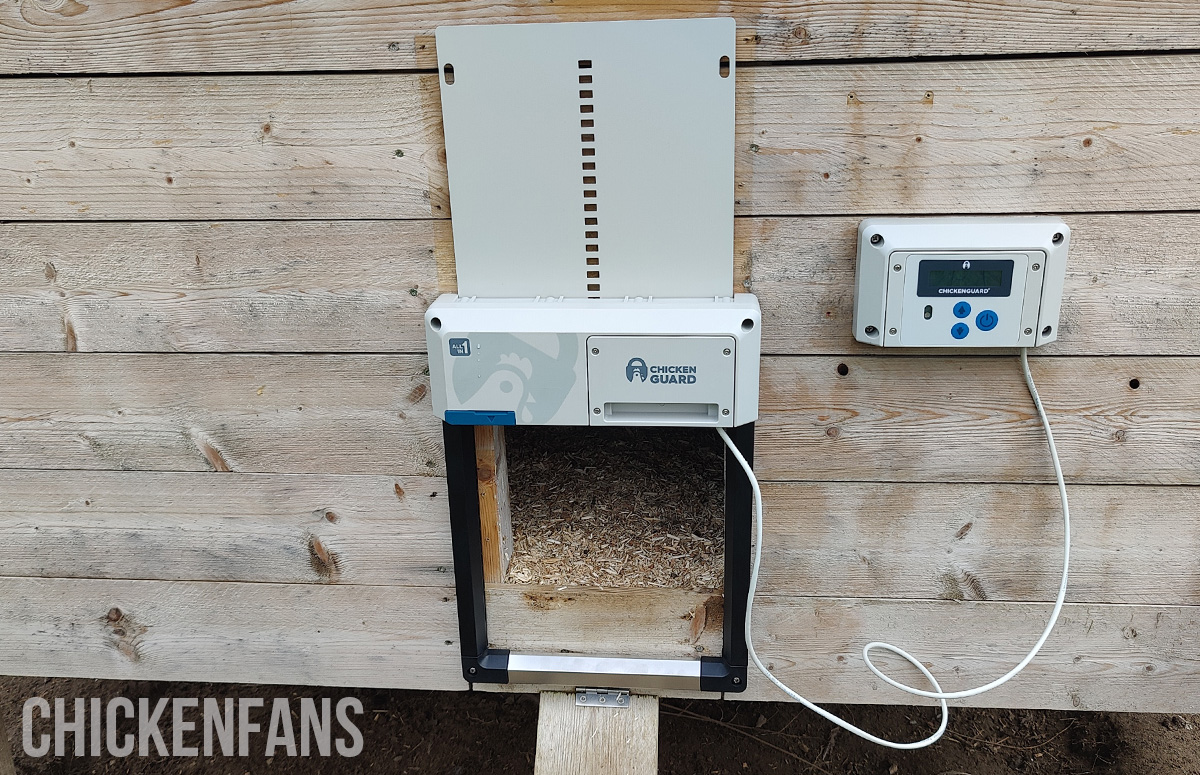
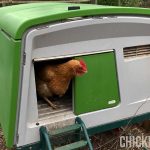
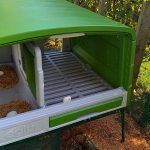
The ChickenGuard All-in-One chicken coop door opener is a brand new addition to the ChickenGuard lineup of coop door openers. While the company offers several options, including the standard, premium, and extreme versions, this door stands out as their first all-in-one solution, designed for ease of installation.
Forget the complicated runners and gates of the past. This model comes ready to go right out of the box. Since no assembly is required, it’s the ideal choice if you want a high-tech coop without the “handyman” headaches. It includes an all-in-one door and an extension box.
It arrives completely pre-installed; there is no need for complicated assembly. Buyers no longer have to spend time puzzling over installation steps, making it a fantastic choice for those not particularly handy.
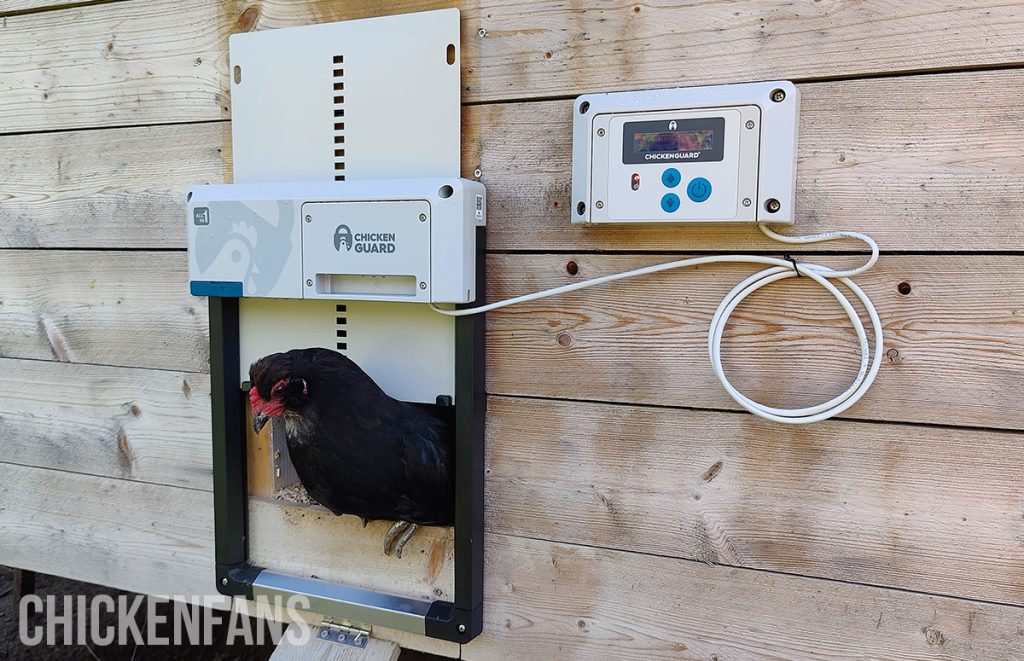
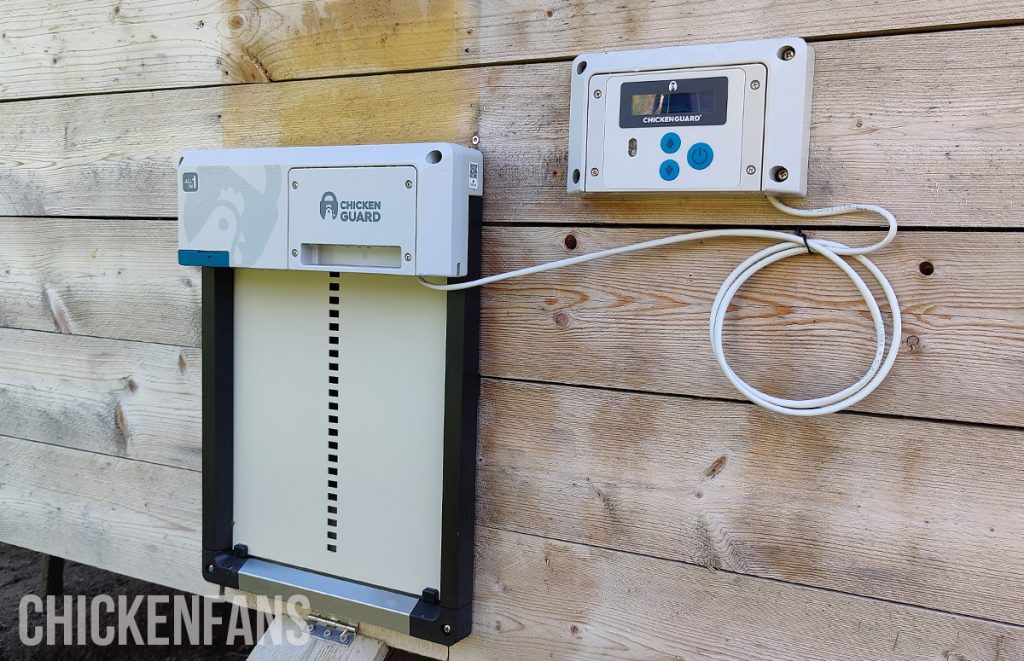
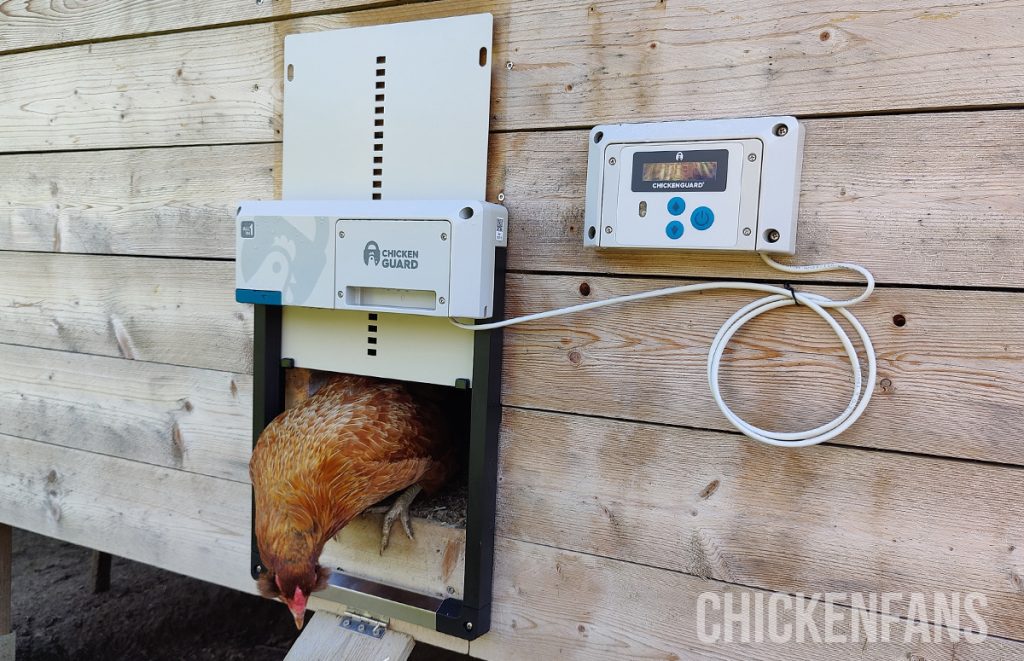
Extension Box
You can use the door either with or without installing the extension box. The extension box is an optional feature, especially convenient for those with big coops or if you want to be able to adjust the settings without going to the coop.
It allows you to avoid going inside the coop to press buttons or make adjustments. You can mount the controller anywhere you want.

Additionally, this function offers other conveniences. If you’d rather not bend down to reach the door, you can position it at a more accessible height. And if your coop’s location is a bit dark and you want to use the light sensor, the extension kit allows you to move it to a spot with more light.
However, if you are comfortable adjusting the door settings at the door itself, you do not need to install the extension box.
Design
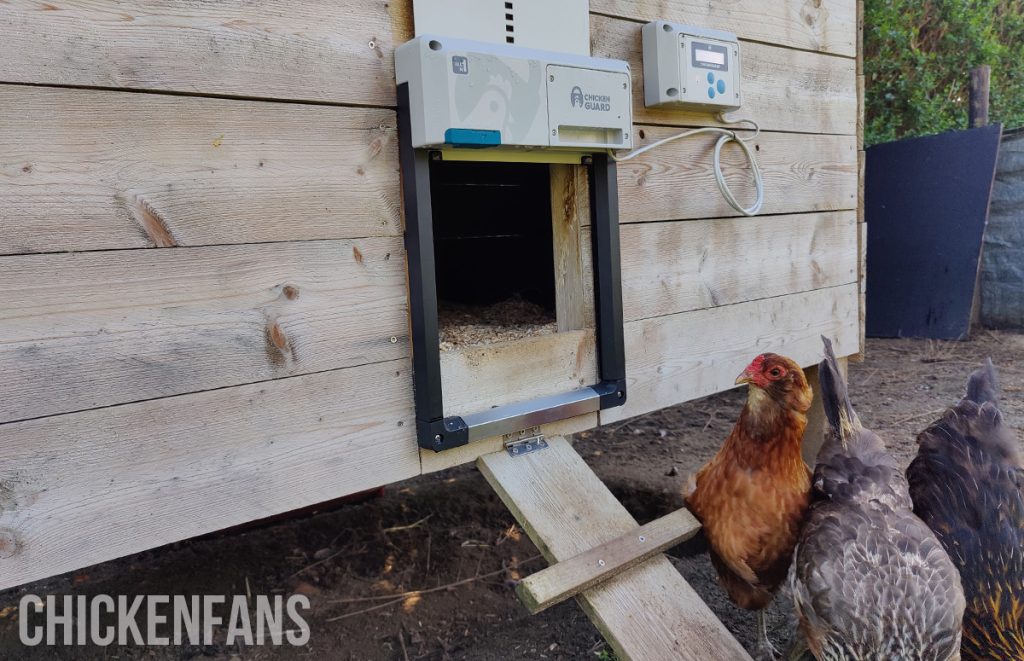
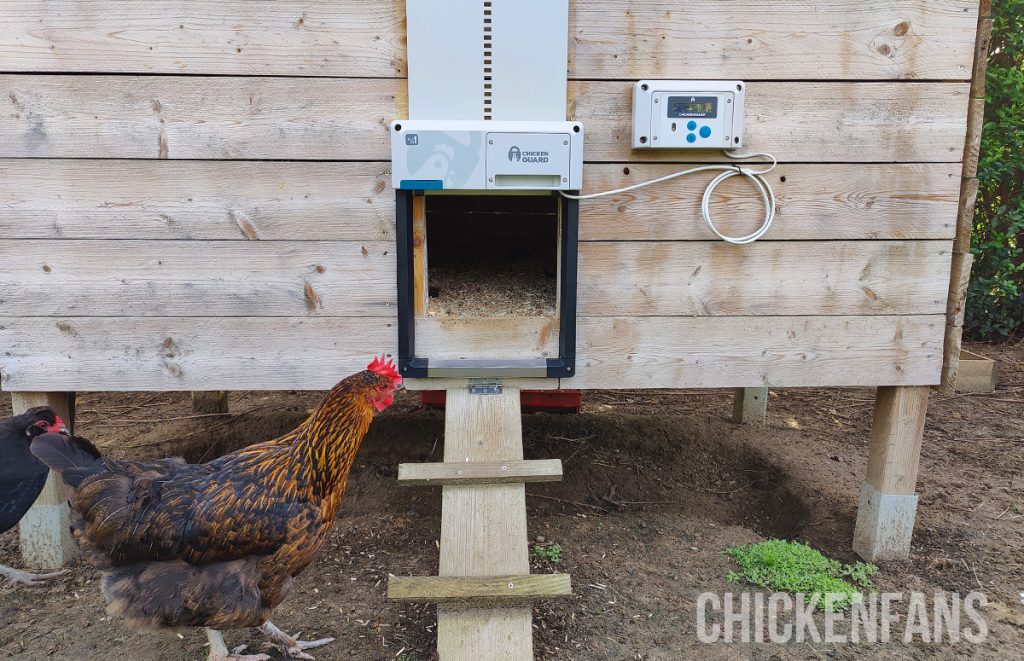
The ChickenGuard All-in-One has a clean and sleek design, consistent with its previous doors, setting it apart from some competitors, like the Omlet. The complete system measures 12.5 inches in length, 3 inches in width, and 17.5 inches in height, and the door opening itself is 12 inches in height and 10 inches in width.
This is a larger opening than most other chicken coop doors, which also suits this automatic door for other poultry.
This door is constructed from durable materials, including ABS UV Stabilized Plastic and Powder Coated Aluminum. Its design is built to withstand harsh weather conditions, but for extreme winter weather, the manufacturer recommends applying a water-dissipation lubricant like WD40 to the door and runners.
While most people prefer to install the door on the outside of the coop, it’s worth noting that this model can also be installed inside. However, when installed inside, you cannot rely on the light sensor unless you mount the door inside the coop and the extension box outside.
Safety Stop Function
The safety stop in the ChickenGuard All-in-One chicken coop door (called the ‘door ajar sensor‘ in the instructions manual) is a safety feature designed to protect your chickens from harm. This ensures the door stops and reverses its movement if it encounters any resistance or obstruction while closing.
Here’s how the safety stop works:
- Sensing Resistance: As the door closes, it continuously monitors for unusual resistance. This resistance could be caused by a chicken, debris, or any other object that might block the door.
- Immediate Response: If the door detects any resistance, it immediately halts its downward movement. This response prevents any potential harm to chickens that might be in the way.
- Reversal: After stopping, the door will reopen. After a few seconds, it will close again.
We tried out the safety stop using a balloon and here’s what it looked like:
The safety stop provides peace of mind, knowing that their flock is protected from accidental injuries caused by the door. It’s particularly useful when chickens linger near the door during closing time.
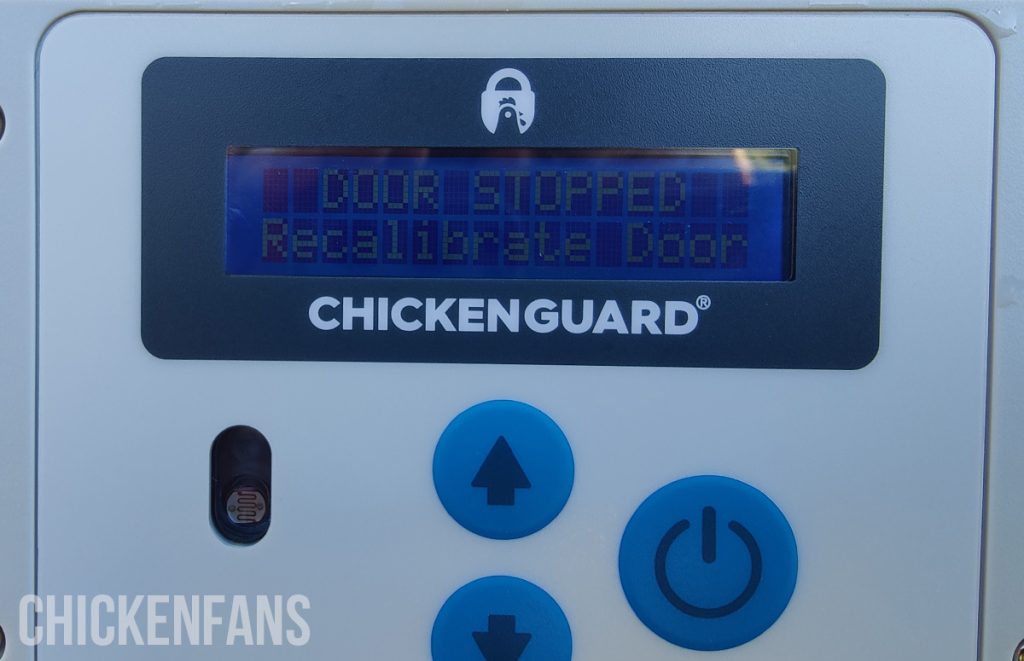
It’s important to mention that the door has to be recalibrated after a safety stop occurred. It will no longer open and close with the chosen setting until you’ve completed the calibration process. The panel will light up and display: ‘DOOR STOPPED – recalibrate door’.
If you want to test the safety stop, please remember the resistance sensor is designed to detect chicken-sized objects; testing with a flat hand is not recommended.
Manual vs. Light Sensor vs. Timer
There are three types of opening and closing settings, so you can choose which one you prefer: manual, timer, or light sensor. The default setting is the light sensor to open and close the door.
Manual
The manual function allows you to have direct control over the coop door. It will only open or close by physically pressing the up/down button. This function is particularly useful if you want to keep control over when to open or close the coop or if you have ducks, as they are no creatures of habit.
You can also combine the manual setting with the timer and set a timed opening hour in the morning and a manual close at night.
Light Sensor
The light sensor is the easiest to use as it follows the seasons and relies on the built-in sensor to detect changes in natural lighting. It opens the door at dawn and closes it at dusk based on the light levels.
It’s the default setting in the ChickenGuard All-In-One door and a ‘set-and-forget’ option that’s especially valuable for those who want minimal set-up involvement.
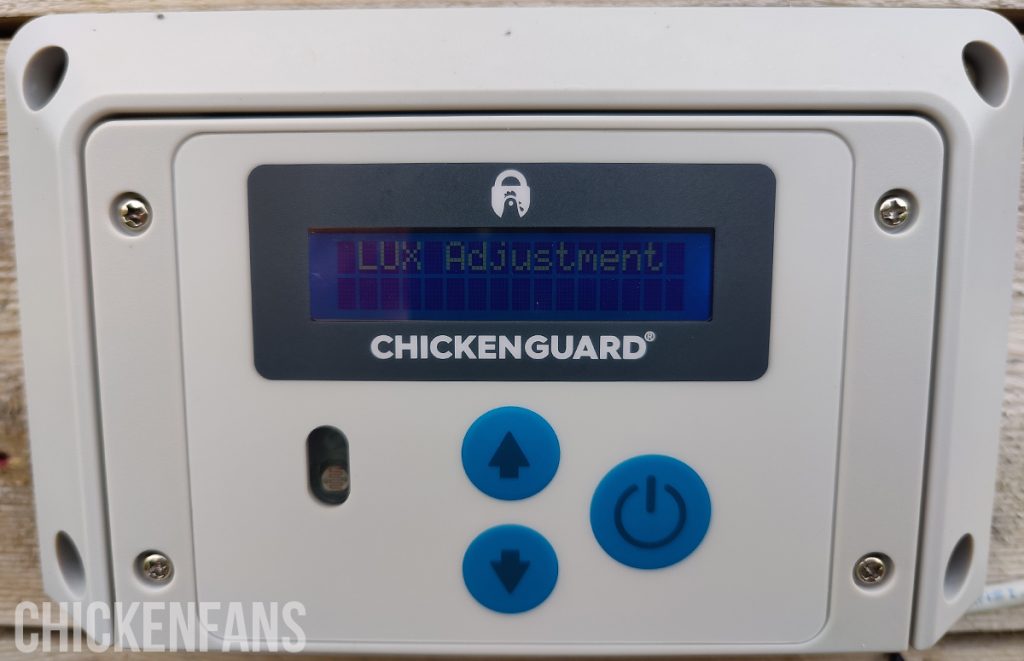
You can set a delay with the ‘sensor delay option’ when using the light sensor, anywhere between 0 and 60 minutes. This will delay the opening or closing after sunrise or sunset, preventing your chickens from being locked out at night. It is also possible to adjust the sensitivity of the light sensor in the LUX adjustment menu.
Timer
With the timer, you can set specific times for the door to close or open. It follows a predetermined schedule regardless of daylight hours.
This may have some advantages, but it’s essential to remember that it will keep on operating on a fixed schedule, regardless of the daylight hours or season. It will not automatically adjust to the shifting daylight hours throughout the year, and you’ll need to reset the time in winter/summertime.
This means you must make periodic adjustments to the time and the opening and closing times throughout the year to ensure your chickens have access to daylight.
Dual Safety Function Lux+
In addition to the manual, timer, and light sensor, the ChickenGuard All-in-One door opener offers a unique “Dual Safety Lux+ Function.” This setting combines the reliability of the light sensor and timer for improved safety.
When you select the Dual Safety Lux+ option, you’ll be prompted to set a default time. Once this default time is configured, the door primarily relies on the light sensor for opening and closing.
However, here’s where the dual safety feature comes in: If, for some reason, it’s not dark enough at the default time, the timer will override the light sensor and close based on the default time you’ve specified.
This ensures that your chickens are securely tucked in at the intended hour, regardless of the light conditions.
Independence of Opening and Closing Settings
It’s important to note that all the available settings run independently. This means you can use different methods for opening and closing the coop door. For instance, you can set the door to open automatically with the light sensor in the morning and use the timer to close it in the evening, tailoring to your specific preferences.
This customization allows you to create a coop door schedule that aligns perfectly with your daily routines and changing seasons, providing your flock with the utmost safety.
Power Supply
The ChickenGuard AiO (All-in-One) is designed to be versatile in terms of its power source, as you can choose to use DC power or batteries.
DC Power
To power the door effectively, you’ll need an external DC power supply with a 9-12 volts voltage and a capacity of at least 1 Amp. The socket for the external power supply is located behind the front panel of the main unit.

Batteries
Regarding the batteries, it’s essential to note that 9-volt or rechargeable batteries are unsuitable for this door. Only use AA alkaline or lithium batteries, but do not mix lithium batteries with other types as this will lead to fire risk. Four alkaline batteries are already included in your purchase, lasting up to three months.

When it’s time to change the batteries, you’ll notice a red LED on the front panel that will light up as an indicator. The good news is that your settings will be preserved after changing the batteries, ensuring that your preferred operation schedule remains intact.
You can check the battery level anytime by pressing the ‘menu’ button and selecting ‘misc settings’.
ChickenGuard SMART
The ChickenGuard AiO is the first ChickenGuard door that can be operated using an app on your phone. The app is called ChickenGuard SMART and is available for Android and iOS users. This function lets you communicate with your chicken coop door through the app.
According to the manual, the app can only be used when you operate the door by main power supply. In short, if you use batteries to operate the door, the app won’t connect to your door.
Comparing the ChickenGuard All-in-One to Its Previous Version
ChickenGuard made its debut in the chicken coop door market in 2013. Since then, they’ve specialized in making automatic chicken coop door openers equipped with timers, light sensors, and door openers designed to withstand extreme weather conditions.
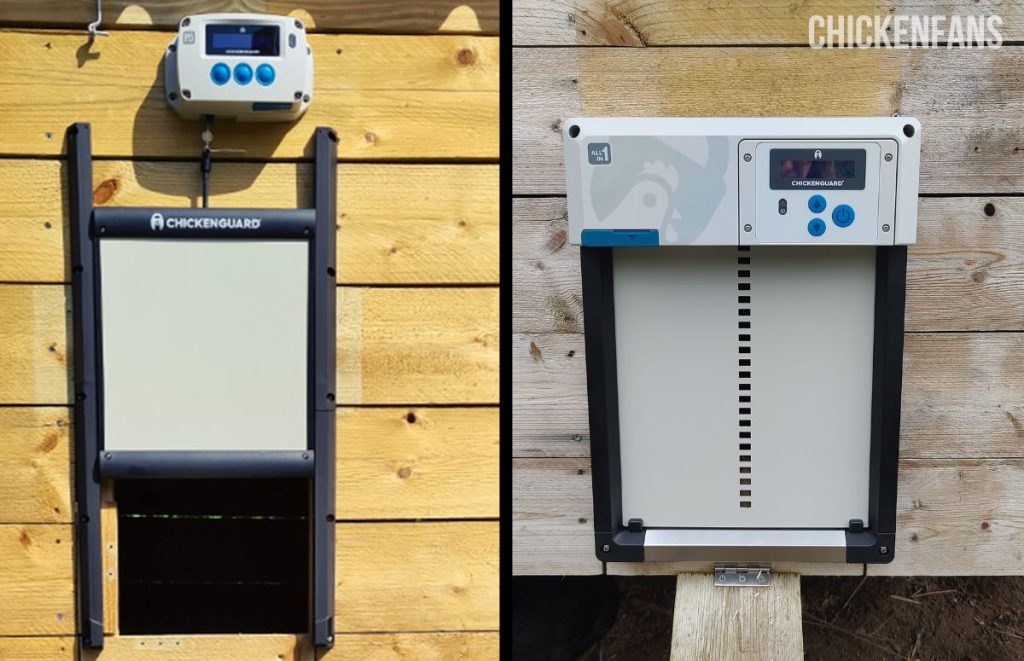
The previous ChickenGuard door system consisted of two components: the door itself, complete with plastic runners, and a separate motor unit for the door’s opening and closing. This motor unit was offered in three versions: standard, premium, and extreme.
While ChickenGuard has introduced its innovative all-in-one model to cater to the evolving needs of chicken keepers, the original ChickenGuard doors remain available for purchase.
If you find yourself torn between the two options, we’ve compiled a comprehensive overview to help you make an informed choice.
| ChickenGuard | Standard (S) | Extreme (X) | Pro | All-in-One |
|---|---|---|---|---|
| Open & Close Manually | yes | yes | yes | yes |
| Open & Close with a Timer | yes | yes | yes | yes |
| Open & Close with a Light Sensor (LUX) | no | yes | yes | yes |
| LCD Display | yes | yes | yes | yes |
| 4 x AA batteries | yes | yes | yes | yes |
| Electric powered via USB (Alternative) | yes | yes | yes | yes |
| Door closed indicator | yes | yes | yes | yes |
| Low battery warning | yes | yes | yes | yes |
| 3-year warranty | yes | yes | yes | yes |
| Maximum door weight | 2.2 lb (1kg) | 8lb (4kg) | 8lb (4kg) | 8lb (4kg) |
| Weather Temperatures | 14°F (-10°C) | -4°F (-20°C) | -4°F (-20°C) | -4°F (-20°C) |
| Winter Mode | no | no | no | yes |
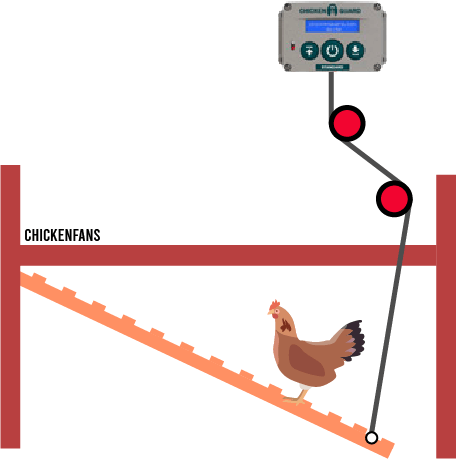
The primary difference between the new All-in-One (AiO) version and the original ChickenGuard lies in the setup possibilities. In the older version, where the door and motor unit are separate components, you have greater flexibility regarding door mounting options, which isn’t the case with the all-in-one model.
If your chicken coop has a unique configuration, you can utilize pulleys to create a customized arrangement. To illustrate, the door opener can still be used if you opt not to use the door but have a ramp for your chickens to access the coop.
Because the previous version sells the door and opener unit separately, you gain the freedom to experiment with the setup, which isn’t possible with a pre-assembled door.
Comparing the ChickenGuard All-in-One to Its Competitors
When it comes to keeping your chickens safe, an automatic chicken coop door is an invaluable addition to your coop. These devices offer convenience, protection, and peace of mind. Among the array of options available in the market, five top contenders have emerged: ChickenGuard, Run Chicken, Omlet, VEVOR, and Chickcozy.
Each of these automatic coop doors has unique features, catering to the diverse needs of chicken keepers. Let’s delve into comparing the ChickenGuard All-in-One to its competitors, helping you make an informed choice.
Features:
| Feature | Run-Chicken | Omlet | ChickenGuard All in One | ChickCozy | VEVOR |
|---|---|---|---|---|---|
| Power Supply | 4 x AA batteries (T50) or Solar + rechargeable batteries (E50) (all included) | 4 x AA batteries (not included) or 12V adapter (sold separately) | 4x AA batteries (included) or DC power (adapter not included) | 4 x AA batteries & outlet power (included) | 4 x AA batteries (not included) |
| Sliding Door | No, opens upwards | Yes | No, opens upwards | Yes | No, opens upwards |
| Hole Size | 8” x 10” | 7.75″ x 11.75″ | 10″ x 12″ | 8.15″ x 10.43″ | 10″ x 12″ |
| App Control | Yes | No | Yes (Coming soon) | No | No |
| Installation Ease | Easy | Moderate | Moderate | Easy | Easy |
| Material | Plastic + aluminum | Plastic | Plastic + aluminum | Plastic | Aluminum frame attached to ABS plastic |
| Waterproof | Yes | Yes | Yes | Yes | Yes |
| Light Sensor | Yes | Yes | Yes | Yes | Yes |
| Timer Function | Yes | Yes | Yes | Yes | Yes |
| Separate open & close settings | Yes | No | Yes | No | Yes |
| Safety | Automatic stop, obstacle detection | Automatic stop, obstacle detection | Automatic stop, obstacle detection | Automatic stop, obstacle detection | Automatic stop, obstacle detection |
| GPS Mode | Yes | No | No | No | No |
| Noise Level | Average | Quiet | Quiet | Quiet | Average |
| Maintenance | Easy | Easy | Easy | Easy | Easy |
| Cold Weather Resistance | -15°F to 140°F | Tested to -4°F | – 4°F to 140°F | -15°F to 140°F | -22°F to 131°F |
| Price Range | $140 – $240 | $180 | $180 – $200 | $150 – $170 | $60 – $110 |
| Warranty | 1 year (after registration) | 2 years | 3 years (after registration) | 2 years | 1 year |
Please note that the specific features of these automatic chicken coop doors may vary by model or version within each brand’s product line. They can also change after each update. It’s important to review the product specifications to ensure it meets your needs.
Potential Drawbacks of the ChickenGuard All-in-One
Let’s face it: after thoroughly testing the ChickenGuard AiO, we have to conclude that it is a high-quality, sturdy door from a well-known manufacturer with excellent after-sale support. You’ll get great value for money, but that doesn’t mean there are things to keep in mind before purchasing.
Size and Weight
One potential drawback of the ChickenGuard AiO is its size and weight, which may not be suitable for all coop setups. The complete system weighs around 3.5 lbs and measures 12.5 inches in length, 3 inches in width, and 17.5 inches in height. It also requires a significant amount of space above the door opening (at least 10 inches).
However, it’s important to note that the larger measurements do make the door well-suited for larger poultry, including ducks, in addition to chickens.
App Use
A big disadvantage of the ChickenGuard SMART app is you can’t use it if your door is powered by batteries. The app will only connect to your door when powered by main power supply.
LED Screen
We had some issues reading the LED screen in bright daylight. This may be inconvenient if you want to adjust the settings during a sunny day.
Installation
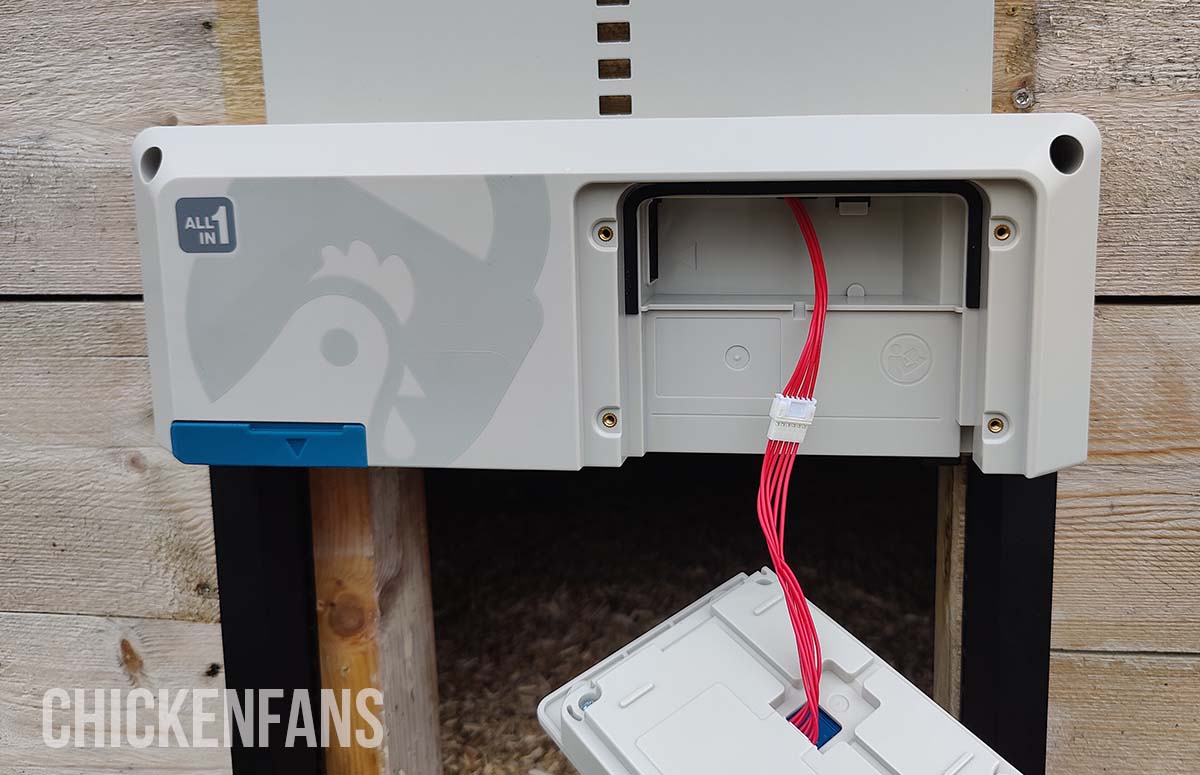
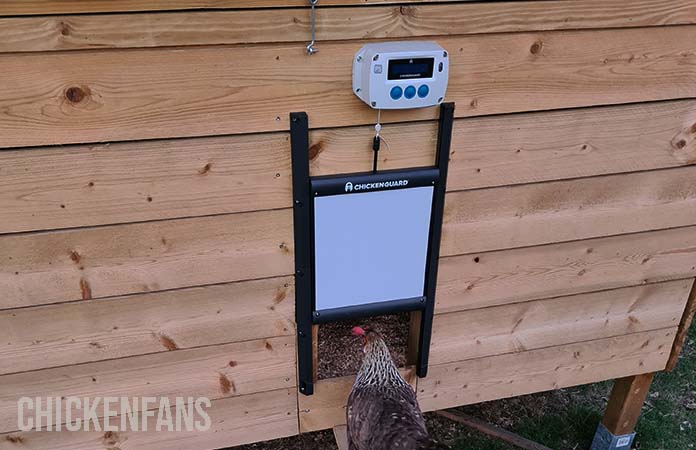
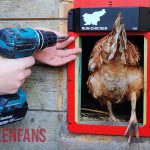
The installation of the ChickenGuard All-in-One comes in two parts. First, you need to mount the actual door and place the batteries. After that, you can install the extension box, but as mentioned before, this step is completely optional.
The only reason you would install the extension box is that you won’t have to go to the door to operate it and adjust the settings. If you are ok with operating the door with the control panel on the door itself, you do not need to install the extension box.
Installation of the All-in-One Door
This is the easy part. It only takes around 5 minutes if you don’t have to adjust the coop entrance to fit the door.
Step 1: Use four of the included screws to mount the all-in-one door to the coop.
Step 2: Place the batteries and put them back into place.
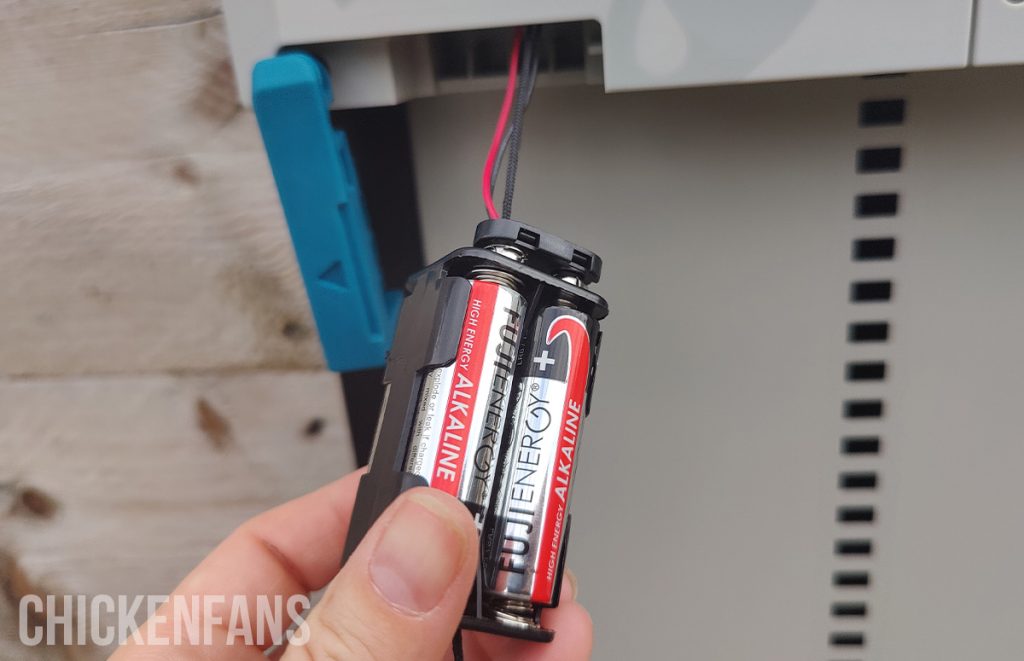
Now you have to wait a couple of minutes. Although it may seem nothing is happening and the door is not functioning, it will automatically open after approximately 3 minutes. The door is shipped in the closed position and will open once the batteries are placed.
That’s it. You only need to go through the initial setup to specify language, set the time, and choose open/close settings, and you’re done.
You don’t need to use the extension box to operate the door; it’s entirely optional and up to you whether you want to install it or not. The main benefit of the extension box is it’s great for larger coops, and you can position the control panel anywhere you want.
If you are okay with using the control panel on the door itself, installing the extension box is unnecessary. But if you do want to use it, we’ll explain step-by-step how to do this.
Installation of the Extension Box
This part is a bit trickier. The installation manual is clear but very basic. It’s possible to overlook a step or make an error (which can be rectified), but there are numerous instructional videos on YouTube to guide you through the process if you’re unsure how to handle this.
It took us another 20 to 30 minutes (one person) to install the extension box and try it out. We created an extensive ‘How-to’ list, including photos, as not all necessary steps are mentioned in the instruction manual, which can be confusing.
We’ve contacted ChickenGuard to address this, and they have told us a new, more complete version of the instruction manual is coming.
Time needed: 30 minutes
- Remove the unit’s front panel
Remove the front panel to connect the network cable (and, optionally, a DC power adapter). Completely disconnect the front panel from the door by separating the red connecting cable; this is not mentioned in the manual but needs to be done.
- Connect the network cable
Connect the cable to the socket indicated. The manual indicates to make sure the cable goes through the top, but in our case, this was impossible. The cable didn’t fit in the top grooves. However, it did fit at the bottom, so we tucked the cable away to the best of our abilities.
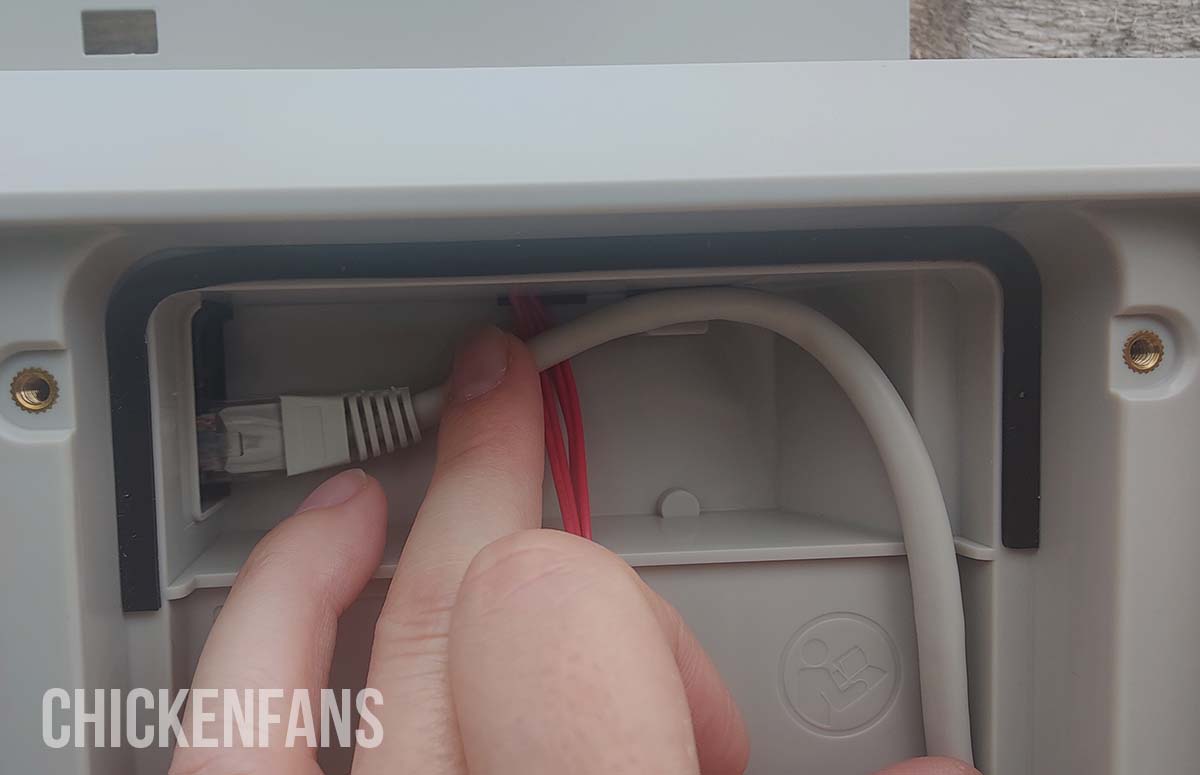
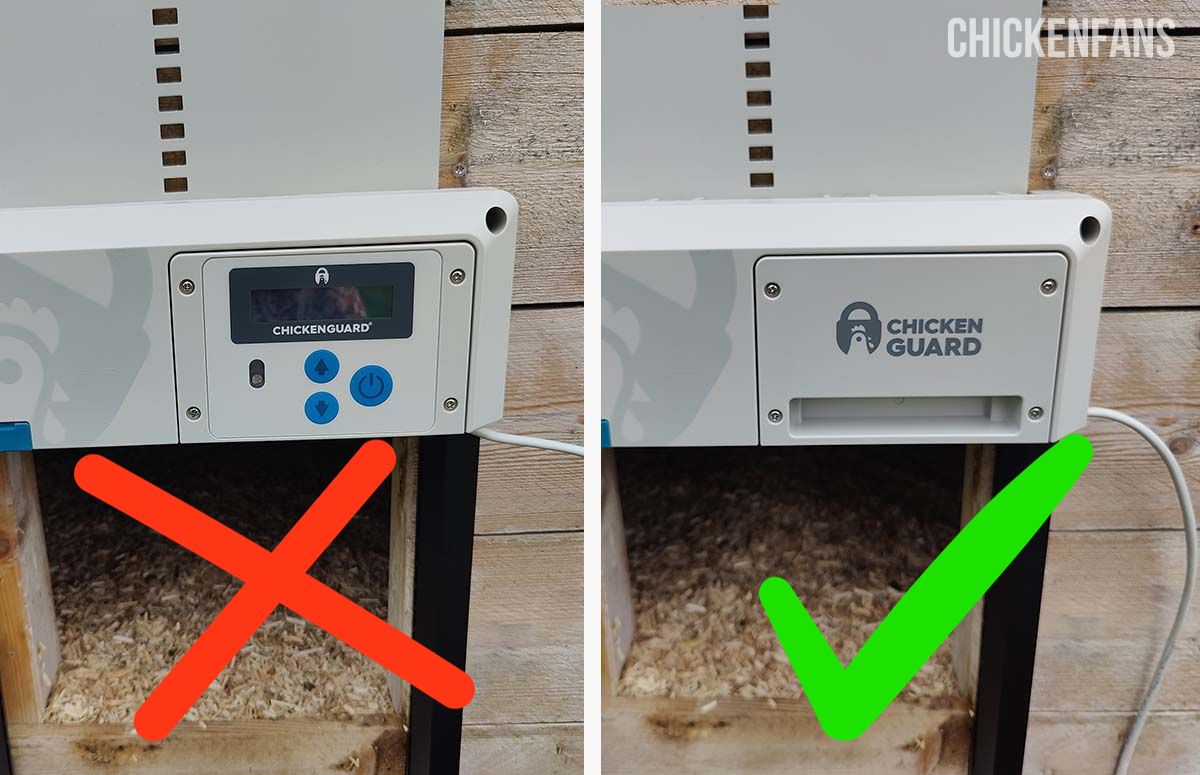
- Screw the blanking plate into place
This is important: Do NOT screw the original front panel (with blue buttons and screen) back into place but remove the cover from the extension box and screw it onto the front of the door.
- Connect the other side of the network cable
Connect the other side of the network cable to the extension box. The USB port is located at the rear of the extension box. Ensure the cable exits through the groove at the bottom.

- Screw the front panel in place and connect the red cable
Before screwing the front panel back into place, connect the red cable of the extension box and the front panel together. Again, this is not mentioned in the instruction manual, but it needs to be done. Screw the front panel into place.
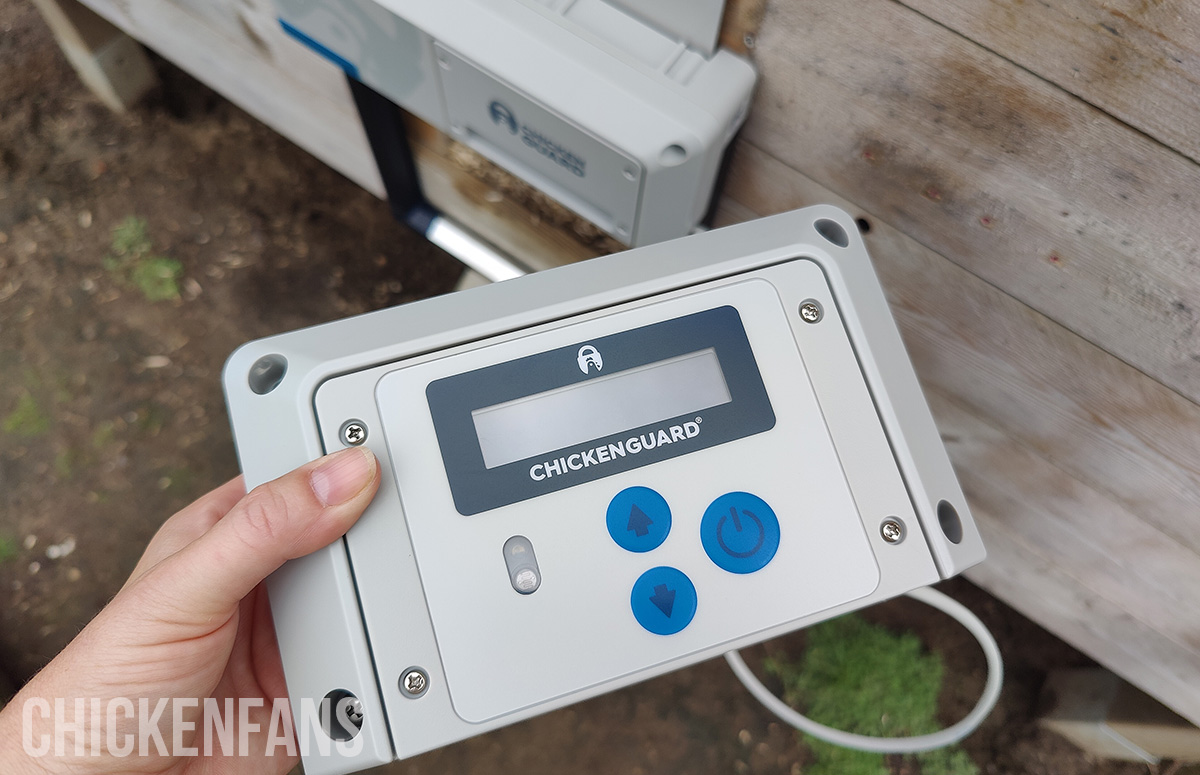
- Mount the extension box
Place the extension box wherever you want. The cable is almost 5 ft long (1.5m), so you’ll definitely find a great spot. After that, rearrange or tuck away the cable so it doesn’t look messy. (optional).
Great! Now, you are ready to choose all settings for your automatic chicken coop door. This includes language options, time, door calibration, and preferred opening/closing settings.
Initial Setup
To get your door up and running, follow these straightforward setup steps. This process didn’t take us much longer than 5 to 10 minutes.
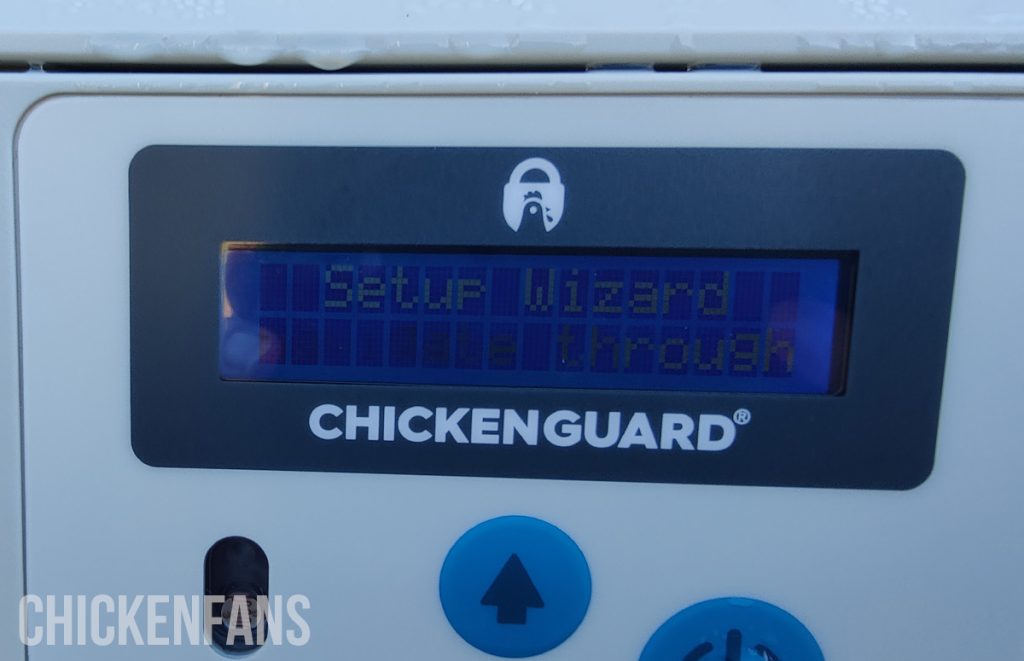
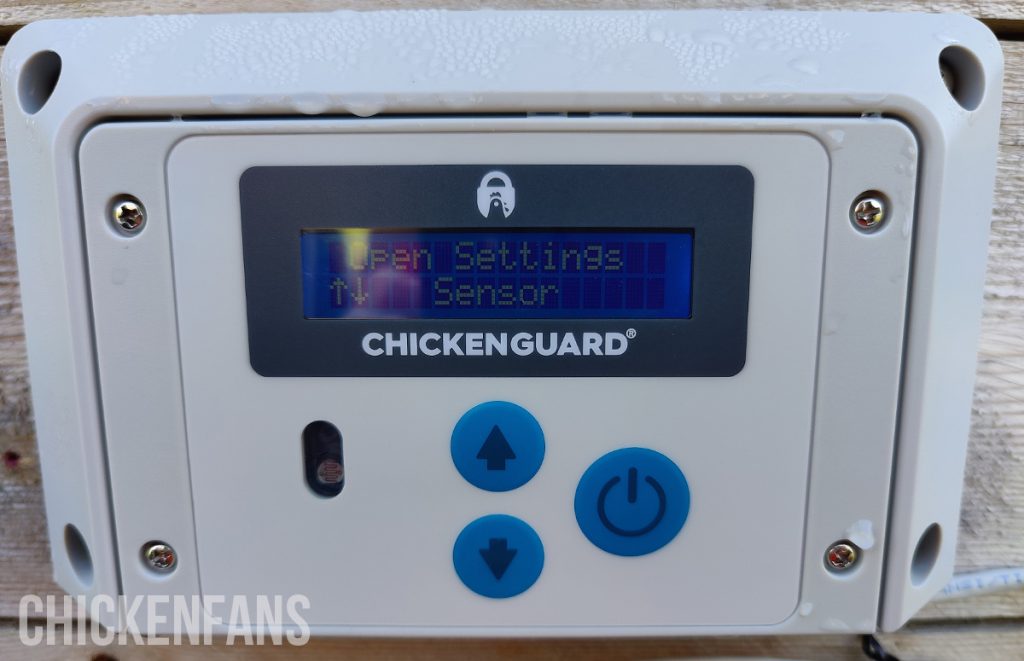
- Begin by pressing the menu button and selecting ‘setup wizard’. Within this menu, you can configure the most essential settings for your coop door, such as language, time and open and close settings.
- Follow all steps to complete the initial setup.
- Once you’ve completed all setup steps, the display will prompt you to calibrate the door. This will close, open, and reclose the door.
- After the calibration is finished and you’ve saved all settings, your door is ready for use. Keep in mind that after calibration, the door remains closed. To open it, simply activate the screen by pressing any button and then press the up button. For manual closure, press the down button.
How We Tested
We conducted a complete evaluation to provide you with an accurate review of the ChickenGuard All-in-One automatic coop door. Our testing process was designed to evaluate the product’s overall performance, functionality, and safety. We tried out the door on our own coop and with our own flock.
Here’s a breakdown of our testing:
- Installation: We began by following the installation instructions to assess how user-friendly the setup process was. We evaluated the clarity of the instructions, the ease of mounting the unit, and the overall time required.
- Performance Testing: We tested the ChickenGuard All in One’s core functionality, including its ability to open and close using different modes, including manual, light sensor, and time.
- Weather Resistance: We tested the door for long periods of time, so it was exposed to various weather conditions, including rain, snow, and extreme temperatures.
- App Functionality: This will be tested later once the app is online.
- Battery Life and Power Options: We conducted tests to measure the ChickenGuard All in One’s battery life. Additionally, we explored its compatibility with DC power sources and how easy the installment was.
- Predator Protection: Our evaluation included observing the ChickenGuard All in One’s effectiveness in preventing potential predators from gaining access to the coop.
- Flock Interaction: We tested the ChickenGuard with our own flock of chickens, closely monitoring their response to the automated door opening and closing and the noise it made.
- Safety Stop: We tested the safety stop multiple times, in multiple setups to be sure it works correctly. This involves intentionally obstructing the door’s path during closing to see how the safety stop works in preventing harm to your flock.
Maintenance and Durability in Cold Weather
The Chickenguard AiO automatic coop door is convenient and relatively low maintenance. Proper maintenance ensures its longevity and reliable performance.
To keep your ChickenGuard auto door in top condition, it’s important to clean it periodically to remove any debris and dirt stuck between the door and the runners. A simple wipe-down with a damp cloth will do the job.
This door can withstand temperatures between -4°F and 140°F (-20°C to 60°C). The manufacturer recommends, however, lubricating the door and runners with a water-dissipation lubricant (WD40, for example) if you’re expecting to operate the door in extreme winter conditions.
If you rely on battery power, check the batteries regularly during winter, as cold weather can impact battery life. When batteries need changing, the red light on the front panel will be permanently lit until they have been replaced.
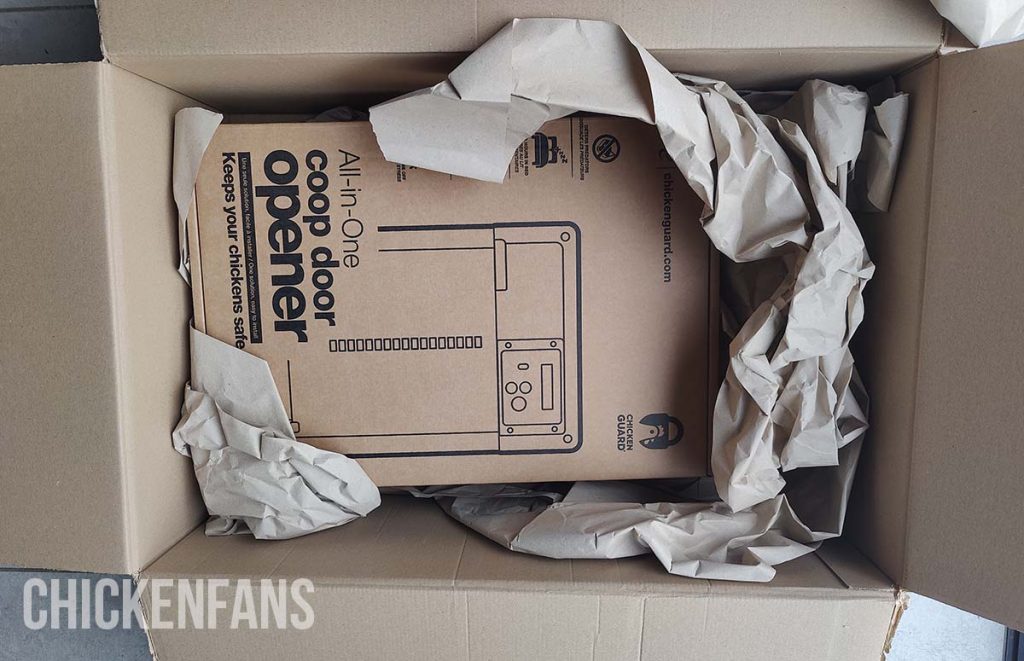
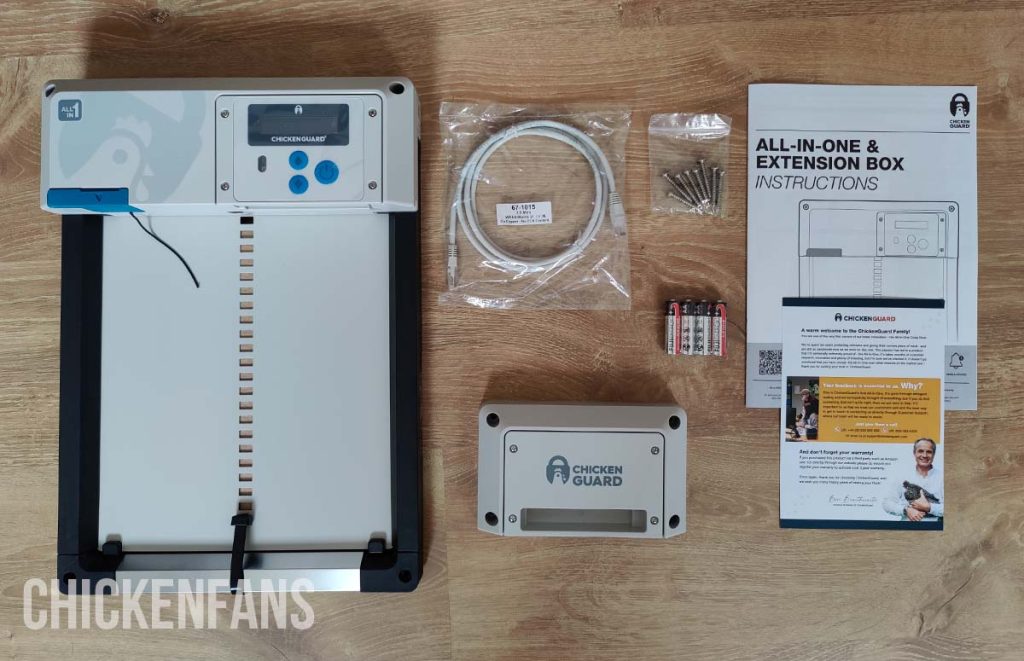
What’s In The Box?
The ChickenGuard All-in-One coop door arrives in a neatly packed flat box. When you open the package, you’ll notice the attention to detail that went into the packaging process.
It’s worth noting that ChickenGuard only sells one version of the all-in-one door, simplifying the purchasing process. You can’t go wrong with your purchase, as you’re getting their tried-and-tested solution.
When we received their first-ever all-in-one Chicken Coop Door, we were delighted to discover a robust, pre-assembled coop door inside the package. It included all the necessary fixing gear, making installation easy.
Content of the package:
- ChickenGuard All-in-One door
- Extension box
- 8 screws
- Instruction manual
- 4 AA batteries
- RJ45 Network cable
Not included but necessary: screwdriver and spirit level.
Price, Availability, and Warranty
The Chickenguard All-in-One is available at a price point ranging from approximately $180 to $200. While it might be considered relatively expensive, it’s worth noting it’s a high-quality door. ChickenGuard products can be purchased on their website, in third-party webshops, or at local stores.
In many cases, shipping costs for the Chickenguard are either free or minimal. However, verifying shipping costs with the seller before finalizing your purchase is a good practice, as shipping policies can vary.
Chickenguard provides a generous 3-year warranty. To activate this warranty, customers must complete a warranty registration or form. There is also a 21-day refund period for unused and undamaged items.
The company is known for its responsive and helpful customer service. Depending on your question, customers can contact them via various channels, including email, telephone, or a support chat with a chatbot or a real team member.
Other ChickenGuard Auto Doors
The All-in-one chicken coop door marks a significant milestone in ChickenGuard’s history. With a track record dating back to 2013, this release represents the company’s inaugural foray into a new, improved version of its previous coop door.
Prior to this innovation, ChickenGuard offered guillotine-style aluminum doors guided by two plastic runners. These doors consisted of two components: the main door, including the plastic runners, and a separate motor unit responsible for door automation.
ChickenGuard offers three versions of their first coop door: the standard, premium, and extreme, each with distinct features. It was among our top choices in our ‘Best Chicken Coop Doors‘ article.
Having successfully supplied thousands of chicken coop doors over the years, ChickenGuard recognized the evolving needs of poultry keepers worldwide.
In response, they proudly introduce their latest creation: the All-in-one chicken coop door. This product represents a culmination of their expertise and dedication to meeting the higher demands of chicken enthusiasts.
If you want to learn more about the ChickenGuard standard, premium, or extreme model, take a look at our in-depth review or consult our installation guide.


