How to Build an Easy Affordable Chicken Coop for 4 to 6 Chickens (+ Chicken Coop Plan)
Chicken Coops are ideal DIY projects. Building your own coop can save money and give you a sense of accomplishment. Your chickens will also forgive you a crooked screw.
There are several chicken coop plans online, but many are complex and challenging to build. We created a simple and straightforward design that everybody can build, even if you lack woodworking skills.
The design doesn’t include fancy windows or decorated nesting boxes, but it’s a fully functional coop with everything you need. You can open up the coop on the top and side for easy maintenance and egg collection.
DIY Chicken Coop Plan Download
How To Download?
Subscribe to our newsletter and get our FREE chicken coop plan PDFs!
Simply fill out the form below, confirm your email, and receive all coop plan PDFs immediately in your mailbox. You can start building today!
Features of the Coop
Here are the features of the coop we’re building:
- provides room for 4 medium to 6 small chickens
- there is plenty of space for 2-4 removable nesting boxes
- you can open the roof for easy maintenance
- you can open the entire side for easy entrance
- it’s standing on legs, so the hens can use it as a shelter
- there is space for 2-3 roosting bars
- clear separation of roosting area and nesting boxes
- the roof sides are open for ventilation
- only straight cuts, no diagonal or angles
Materials
Here is the material you need. The coop plan is flexible, so feel free to replace these items with anything you have lying around.
| Item | Material | Amount / Length |
|---|---|---|
| Base Plate | 3/4″ x 20″ x 6ft plywood/hardwood | 1 |
| Legs | 4×4″ ground contact wood pressured lumber | 8 ft |
| Frame | 2×4″ studs for the frame | 40 ft |
| Sidings | 1×6″ rough pressure-treated lumber (or any sidings you like) | 25 ft2 |
| Roof | 20″ x 6ft plywood or roofing material | 1 |
| Hinges | 2 door hinges and 2 standard hinges | 4 |
| Roosting | 2×4″ roosting bar | 2 |
You will also need screws and standard timber tools, like a saw and an electric drill.
Step-by-step Instructions
Time needed: 6 hours
Here are step-by-step visual instructions to create an affordable chicken coop than can house four to six hens.
- Cut the Legs
Take a 4×4 and saw the legs for the coop to the proper length. We will use post holders later to install them, so we cut them to the exact size. Make them longer if you’re going to dig them in.

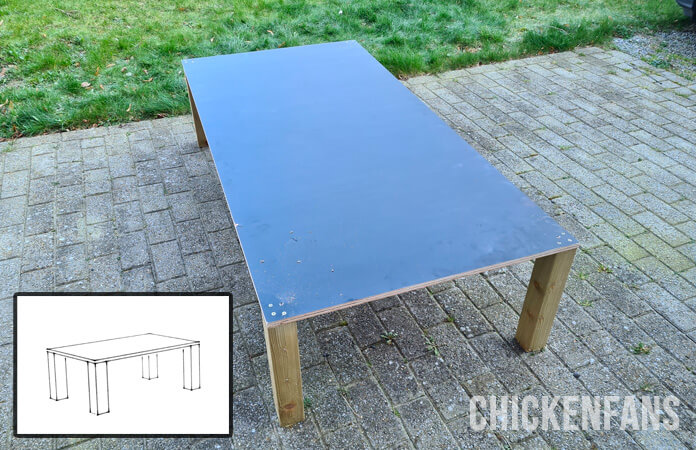
- Create the Base
Create the base of the chicken coop by screwing the legs through the base plate. Use 3-4 long screws, as there will be shear forces on the legs when it’s windy. We use an inch of phenolic plywood for its durability and water resistance.
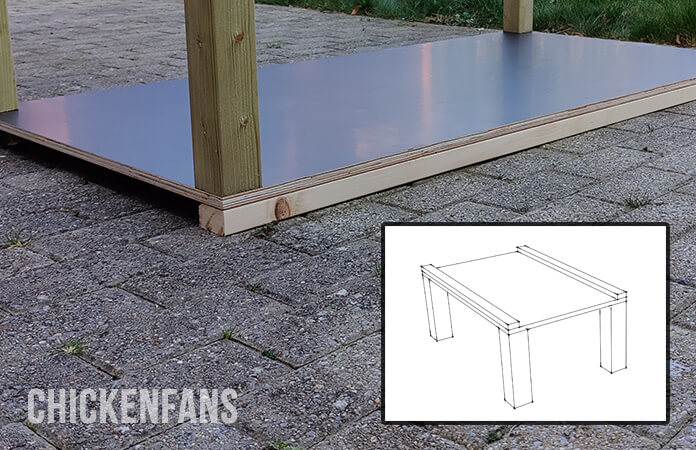
If your coop has long legs, you can create triangles with a wooden plate to prevent the coop from wiggling side to side. Just connect the base and legs with a 45-degree board to create the triangle. - Install the Base Frame
Install the base of the frame by screwing through the plate upside down. This way, the board gets firmly attached to the frame.
- Complete the Base Frame
Repeat this process for all sides. Leave an opening at the side of the door, as it will be much easier to clean and take the bedding out with a flat surface.
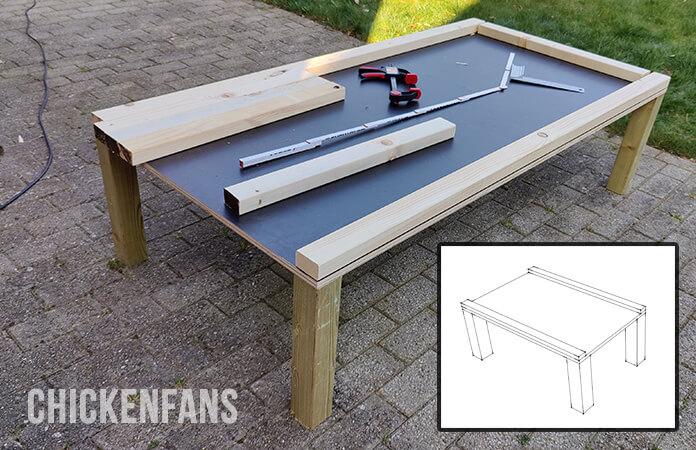
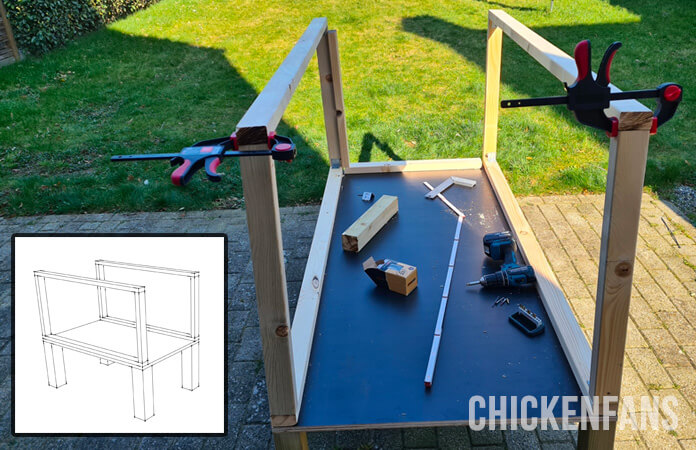
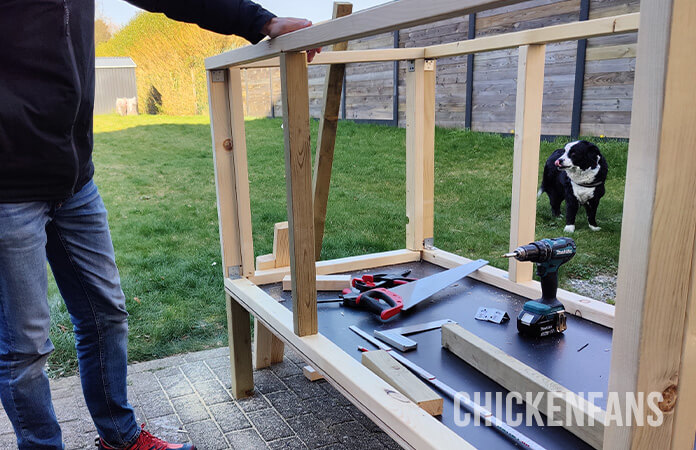
- Install the Long Side Frames
With the base layer in place, screw the base of the side frames on top of the base plate. Then, build up the side frames along the long sides of the chicken coop.
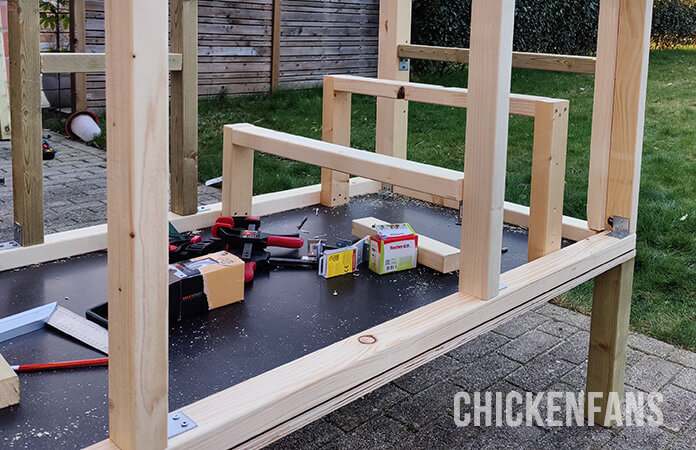
- Install the Short Side Frames
Build a new frame on the inside of the long side frames to build the frame for the shorter sides. You can screw through the existing pieces.
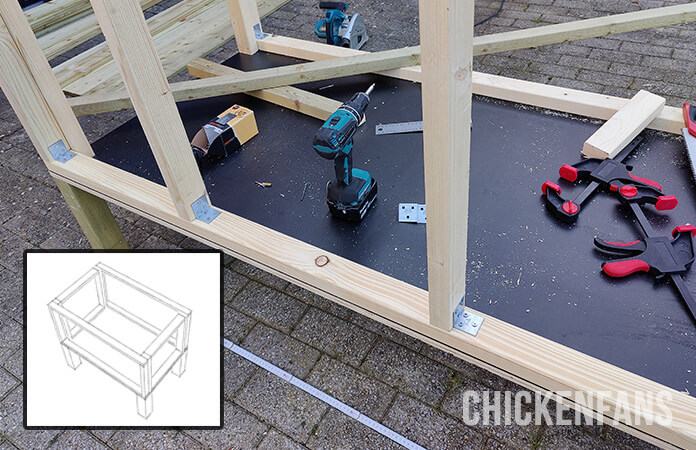
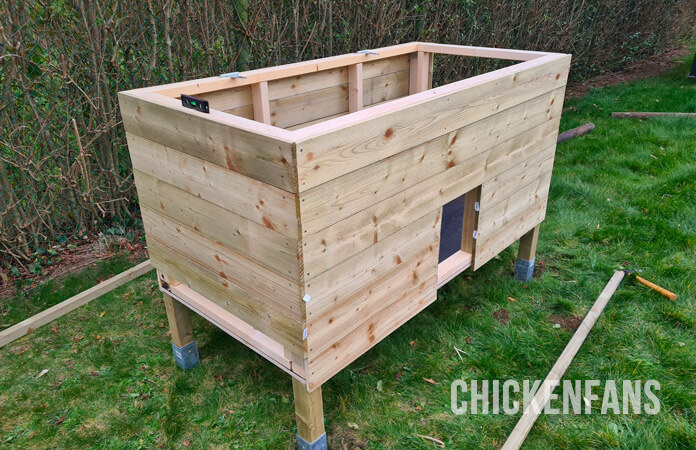
- Finish the Outer Frame
Complete the top of the frame with 2x4s by screwing wood in wood. We use corner anchors to reinforce the frame, but the frame will be rigid enough without anchors when the sides are installed.
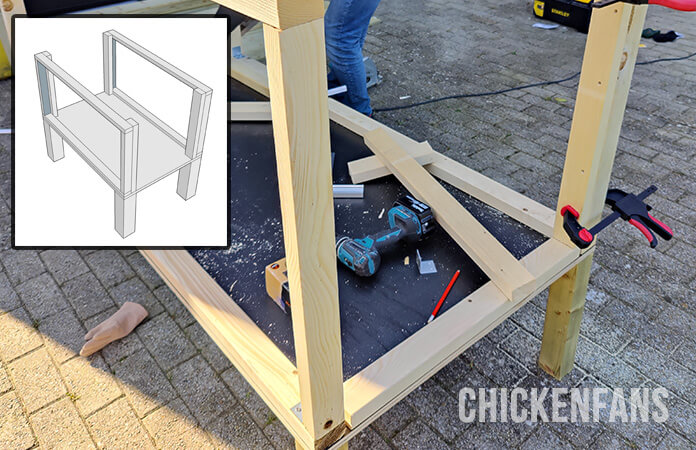
- Reinforce the Back Side
Add some extra 2x4s in the middle of the long side to get a rigid structure. We will also use these to screw the sidings later on.
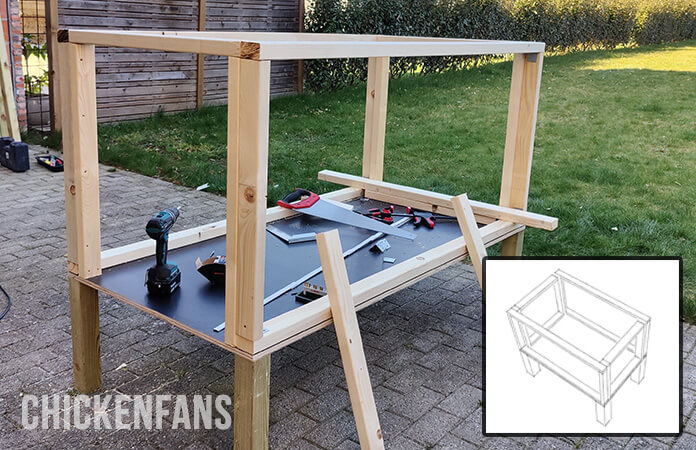
- Reinforce the Door
Do the same on the other side, where the entrance comes. Adjust to the width of your chicken coop door. Bear in mind that some automatic chicken coop doors aren’t that wide.
- Add the Roosting Bars
With the frame complete, it’s easy to attach some roosting bars. You can also do it when the complete coop is finished, but at this point, it’s easier to reach everything.
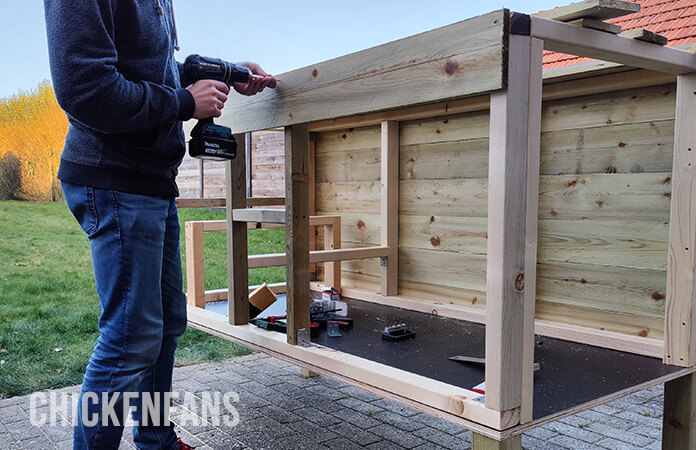
- Add the Sidings
Cut the sidings to the proper length and screw them on the frame. Start at the top so you are level with the frame. It doesn’t really matter how much the sidings stick out on the bottom.
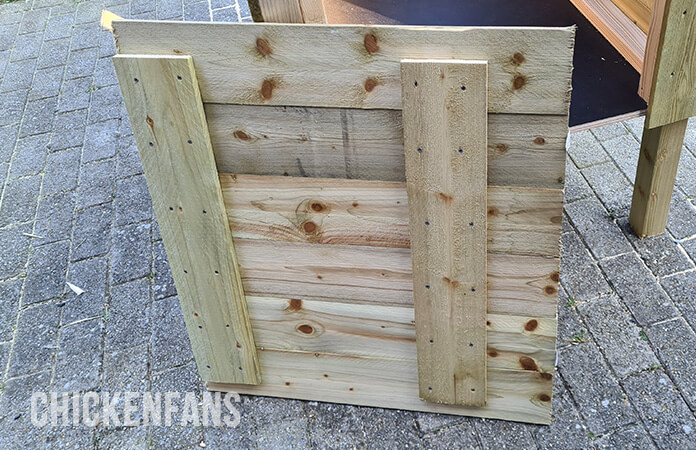
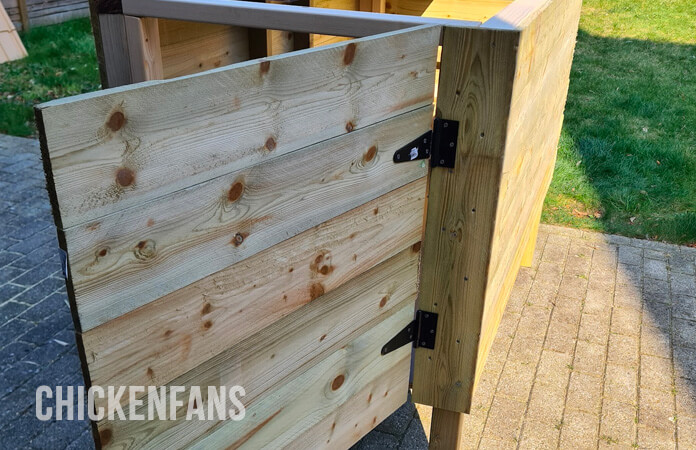
- Create the Maintenance Door
Create a door with a couple of sidings by crossing them with two sidings on the back. Leave some room on the bottom and top to make sure the door closes. Also, leave some extra room on the side where the door closes, as it falls on top of the frame when it closes.
- Attach Hinges to the Maintenance Door
Attach two strong hinges to the door before installing it. The hinges need to be strong enough to carry the door when it’s fully open. Use screws that are long enough to go through both the front sidings and the reinforcement at the back.

- Install the Maintenance Door
Install one vertical siding on the right side of the door. This is where the hinges will attach. Keep the door in place in the closed position when screwing the hinges.
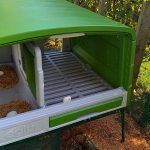
- Install the Base of the Roof
Attach hinges to a 2×4 and install it on the top of the back frame. Attach them on the opposite sides, as shown in the picture. Use two hinges and distribute them evenly over the length of the chicken coop.
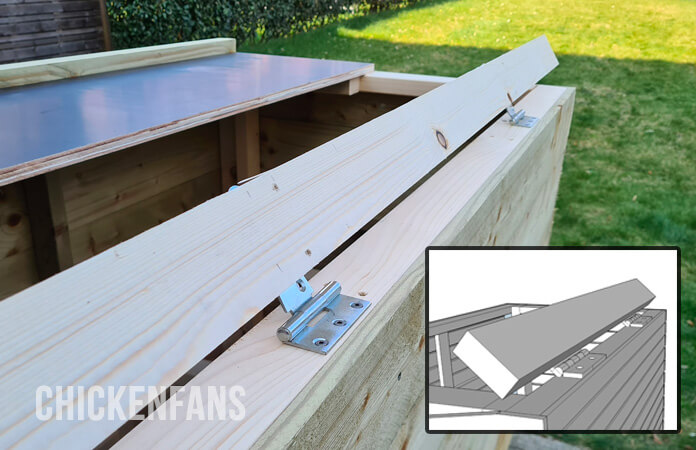
Put the hinges as close to the back as possible so that there is plenty of room for the roof to open. - Attach the Roof
Use two extra 2x4s and some plywood or roofing material to construct the roof. On the front of the coop, add an extra 2×4 to give the roof some slope when it’s closed.
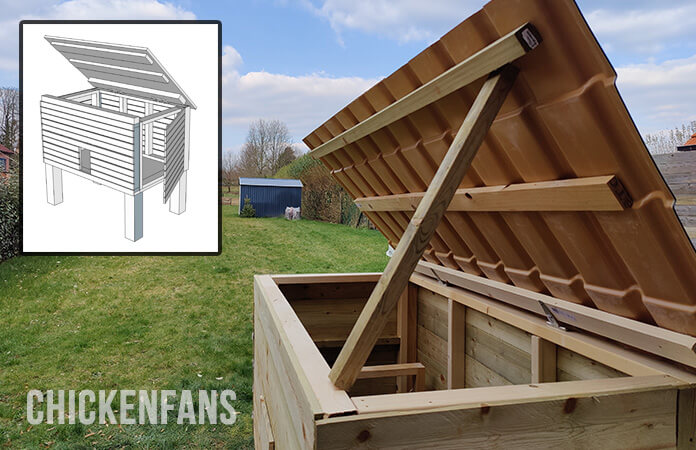
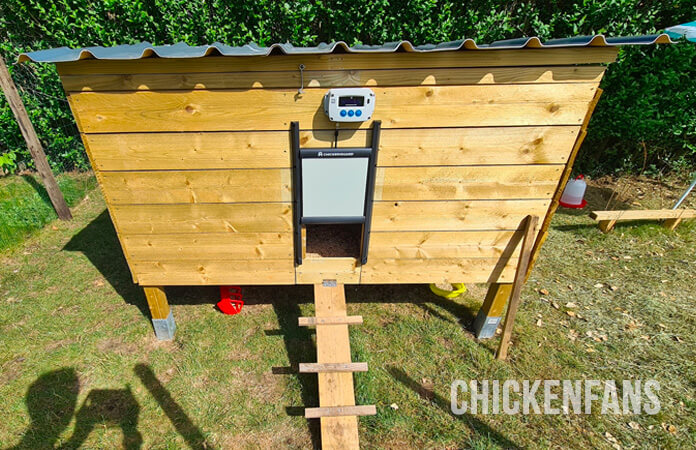
We recommend installing a lock on the roof to prevent wind from lifting the roof. Especially if you have a lightweight roof like in the picture above. - Install the Chicken Coop
Pick a spot to install the coop. We are placing it in uneven grass, using metal fence post anchors with ground spikes to level the coop. If you remove the roof and the door, the coop is easy to carry around with two people.
- Finish the Chicken Coop
Assemble the roof and the maintenance door when the coop is in place. Then install a ramp for the birds to get in and out.
We recommend that you paint the chicken coop. Check our chicken coop paint recommendations to make sure you choose paint or oil that’s safe for your birds.
Last but not least, install an automatic chicken coop door if you don’t like to be elbowed out of bed at cock crow to let the hens out. You can use our chicken coop door installation guide for step-by-step instructions.
That’s it. A complete coop with everything your hens need that’s robust and ready for the test of time.
It’s a fun weekend project and ideal to carry out with the family.
Now it’s your turn to build a chicken coop!
DIY Chicken Coop Plan Download
How To Download?
Subscribe to our newsletter and get our FREE chicken coop plan PDFs!
Simply fill out the form below, confirm your email, and receive all coop plan PDFs immediately in your mailbox. You can start building today!
Next Steps
With the coop in place, you are ready for the next steps:
- provide a roosting area: check our chicken coop guide for the correct dimensions of the roosting bars. The left side of the coop is the roosting area.
- use removable nesting boxes: the chicken coop has two sides. The right side – with the maintenance door – is the laying area. Those areas must be separated to prevent chickens from roosting in their nesting boxes.
- set up the chicken run: set up some fencing around the chicken coop area to provide a run for your birds. Check our chicken coop guide for more info on fencing.
- add the bedding: add a layer of chicken coop bedding and nesting box bedding
- Name your coop! We’ve compiled a HUGE list of chicken coop name ideas, from clever wordplay to pop culture references and thematic inspirations. Ideal for adding character and a sense of identity to your backyard oasis!


